Site
  Home
  Archive
  Search
  About Me
  In Memory Of
  History
  Statistics

     Garage
  Cars Bought
  Cars Custom
  Cars W.I.P.
  Cars Various
  Other Scales
  Diorama
  Virtual Tour
  Wish List

     Users
  More Visited
  Users Top 10
  Collectors
  Users Market

     Video
  DVD Showroom
  Cars Chase
  More Watched

     Various
  Tutorials
  Locations
  Comparisons
  Events
  Miscellaneous
  Download
  Links
  E-Mail
  Guestbook

     Direct Links
  C.G.L.F.C.
  MovieCars
  IMCDB

     Random Event

/027/079.jpg

     Google Search
Google

     Stats
Total Members: 299
Newest Member: MichaelPromi
Hits Today: 2099
Total Hits: 26243
Avg Hits per Day: 4,05

     Who is Online
Welcome,
Online Info
Total Viewers: 25
members: 0
Guests: 25
Online List

Online Record
Most users ever online was 248 on Nov 26, 2024.

     Random Link


     Poll

Do you like the new banner?


Yes


No


     Support
Collier & Co.
Collier & Co.

     Support


     IP 2 Map

Map IP Address


     Google Ads

Last Updates: May 15 2023!!

I do not sell these models. This site is only dedicated to my private collection.


Diecast Detail

Four new models in my collection!

   Added 4 new models: the Dodge Monaco used by Rosco P.Coltrane in the serial "The Duke's of Hazzard", the Chevy van used by B.A.Baracus in the serial "The A-Team" (I will customize this model in the next weeks), the Ferrari F40 and the Lamborghini Countach used by Dolph Lundgren in the movie "Joshua Tree / Army of One".

Posted by: Fabiano on Thu 4/5/2007 10:1800


Easter Holiday... with 2 surprises!!

   Unfortunately, these Easter Holidays are finished but I'm very happy because I received two new models for my collection... These models are very rare to find in my country, but finally they are in my hands!! These two models are the wonderful Munsters Koach and the incredible Munsters Dra-g-ula. In addiction, I discovered that I own an amazing Citroen XM produced by Solido that it's the car used in the famous chase scene in the movie Ronin!

Posted by: Fabiano on Tue 4/10/2007 12:0500


Fast and Furious completed!

   At last, I've completed the main cars used on this great movie: the green Mitsubishi Eclipse used by Brian O'Conner at the beginning of the movie; the red Mazda RX-7 used by Domenique Toretto during the chase with the Mitsubishi Eclipse driven by Brian O'Conner, and finally the black Dodge Charger '70 used by Toretto in the final scene versus the wonderul orange Toyota Supra.

Posted by: Fabiano on Tue 4/20/2007 15:4500


A new Charger in my family!

   Finally, after 2 weeks, I received the Dodge Charger '68 (used in "Bullit") that I won the 20th April on eBay. When I received the car has the rear shock absorbers not connected at the chassis, but in 5 minutes I corrected the problem with a simple screwdriver. Moreover, I have corrected a problem on the rear lights that are attacched in a wrong way to the body. In the end, I have washed the body with the polish and now it's very very shine!
   Only for fun, I have organized a meeting only for my personal Chargers: the new one (1968), the General Lee (1969) and the Fast & Furious stock car (1970), but I think that in the future I will organize a second meeting with more Chargers!!!

Posted by: Fabiano on Tue 5/8/2007 12:1400


Find the differences :)

   Finally, I extracted from the boxes the last 2 diecast models arrived to my home, the Mustang GT "00" and the General Lee with black interior. However, looking the new General Lee I noticed some differences respect my first General Lee: apart the black interior, the main differences are the license plates. In the rear, there is no the common Georgia's "CNH 320" plate but a Florida plate. Moreover, in the front, there is no the common "confederated flag" plate but the same Florida plate. This Florida plate is "072069" (with a little "10" before the other numbers).
   At the end of the evening, I shoot some pictures using my 2 General Lees so, after the 1st Charger Meeting, I organized the 1st General Lee Meeting!!

Posted by: Fabiano on Thu 5/24/2007 14:5300


Miami Vice, a new era

   A new car in my garage!!! This time is the turn of the wonderful F430, the Ferrari used in the 2006 movie "Miami Vice". The model needs only a simple customization to looks like the original car: in the movie, the interiors are not red but black, so in the next days I will change the color.
   Moreover, in these days I'm preparing some new dioramas based on "Hazzard". Stay tuned!

Posted by: Fabiano on Mon 6/4/2007 17:2700


Traveller, Baby!

   Yesterday, I received a new package with new 2 diecast models. It contains a surprise model but I will show you the next week.
   However, today I would to show you that I've started to work on the "Traveller", the '69 Dodge Charger used by John Schneider in the movie "Collier & Co." To do this, I've used a "General Lee" (2005 version) and for the moment, I've removed all the decals with acetone. Moreover, I've started to prepare the engine and the engine compartment.
   In the next days, I will update new pictures with my progress!!

Posted by: Fabiano on Fri 6/29/2007 11:4600


Step by Step... Day by Day

   The last weekend, I worked a lot on the Traveller's engine. I painted every pieces of the engine and then I recreated an air filter with plasticard and paperboard: the original one doesn't looks like the filter used on the real "Traveller", so I preferred to create a new one. Moreover, I added some decals to the body of the car, in particular the two license plates and the sun stripe on the windshield. Now, this model begin to be the "Traveller"!!

Posted by: Fabiano on Mon 7/2/2007 09:0700


New progress on the Traveller and... POSTERS!

   This evenening I've finished to add details to the engine, so in the next pictures you could see a detailed engine and the hood with the autographs of all the living original cast members and crew that were on "The Dukes of Hazzard" TV show.
   Moreover, I started to work on the internal rollbar: I created it using a plastic drinking straw and some pieces of the original rollbar installed when I bought the original model. Now this rollbar is raw, but tomorrow, I will paint it with opaque black, adding the protections for the passengers with sealing tape.


   Moreover, this morning I received a package from the US... on the package there is a label: "John Schneider Webstore". Yeaaa Haaa! In that package there was the "Collier & Co." posters (with autographs) that I bought on eBay from John. Now, I will wait the DVD with the movie. I hope it arrives as soon as possible!!

Posted by: Fabiano on Wed 7/5/2007 23:2800


The Traveller now has a rollbar!!

   The next weekend I will go to visit my girlfriend in Verona, so I will stop my work on the "Traveller". I will restart to work on it monday. However, yesterday evening I've painted the roll bar with black spray and I tryed to see how it looks into the car: I'm enough satify but I need to see the final result when I will finish the car interior. Moreover, I replaced the original exhaust with two little tubes that I've painted with silver spray and now the rear is equal to the real "Traveller".
   Have a nice weekend and see you monday!!

P.S.: Yesterday evening I also received 2 new pictures from Roberto's Collection: the first is the '69 Dodge Charger "Cale Yarborough" version, and the second is a General Lee in "Dusty" version. To see Roberto's collection, please click here.

Posted by: Fabiano on Fri 7/6/2007 10:0600


The dashboard for Collier's Traveller

   New week, new updates!! This time I propose you new pictures of the Traveller's dashboard: to prepare it, I preferred to create a homemade detailed decals, starting with a simple sketch obtained directly pressing a paper on the original dashboard. Then, I scanned my sketch and I acquired it on my PC; with a good graphic software I elaborated it (below, you could see an animation about the steps needed for this process) and when I finished it, I printed on adhesive paper.
   If you want to see more pictures about this step, click on the following picture.

Posted by: Fabiano on Mon 7/9/2007 20:2400


The safety... first of all!

   Good news, good news!!! Other updates on the Traveller: Yesterday evening, I created the Overdrive box using a simple plasticard paper. I've modeled it with a cutter and at the end I've created a little box attaching every piece with a good glue. Then, I've painted the box with gloss black and I've attached a decals created using a picture of the real Traveller owned by John Schneider.
   But I've not finished... I also created the safety belts for the front seats. I used an old shoulder strap and with it I created 6 narrow stripe, 3 for every seat. Then, I glue the pieces and I realized the metal buckle with plasticard painted with silver spray.

Posted by: Fabiano on Thu 7/12/2007 08:5900


A new color for the interior parts!

   As announced, during the last weekend I found the correct paint for the interior parts!!! It's a good tan spray, dug-up in a small paintshop in Erba (CO). So, yesterday evening I started to paint the 2 front seats and the right door panel. The result is very good and I like very much this color (in the pictures, you could notice the difference between the new color and the old plastic effect). This evening, I will paint all the other parts and then I will add some decals to the safety belts.

Posted by: Fabiano on Mon 7/16/2007 09:5300


My new "General Lee"

   Do you remember my project to create a futuristic version of the General Lee? Ok, today it's arrived the moment to show you my last purchase. I bought the great orange Dodge Challenger Concept produced by Maisto: with the "General Lee" decals created by Bugsy's Junkers, I will convert it in a new car for the Hazzard County!! So,I will put together two my passions: the "General Lee" with the wonderful Dodge Challenger Concept!!

Posted by: Fabiano on Wed 7/18/2007 17:1800


A carpet for the Traveller

   Yestarday, I worked hard on the Traveller. First of all, I corrected a problem on the passenger's door: originally, when I extracted the car from its box, I noticed that the passenger's door has been glued to the body, because a screw was broken. So, with a good pincer I extracted the screw and I substituted it with a new one.
   Moreover, I prepared the car carpet to simulate the internal moquette: to do this, I used a Vinavil glue diluted with water, and then I dredged Borotalco. When every components was dry, I painted the car carpet with opaque black. The result is very good!! Now to finish the Traveller I need only 2 things: the fire extinguisher (I order it on eBay) and the rear seats (I will order it monday or tuesday from Bugsy's Junkers).

Posted by: Fabiano on Sun 7/22/2007 11:0500


Another step on the Traveller

   Yesterday evening, I mounted the two front safety belts on the Traveller. If you notice, I also added 2 stickers with the brand "SIMPSON" (produced with my PC), like the real Traveller. This morning given that it's a sunny day, I shot some new pictures on the interior part and with the main body mounted. Now, the Traveller is near to be finished...

Posted by: Fabiano on Wed 7/25/2007 12:1400


The Traveller #2 is arrived to my home

   Yesterday, it's arrived a package with some new models: one of this is another '69 Dodge Charger "General Lee" that I will convert in the Traveller #2 owned by Erik Dimitriou. I think that I will create 3 replicas of this car: one for me, one for Erik and one for Roberto (the greatest collector of Hazzard diecast model in Italy).
   Anyway, before start to work on this model, I organized a new Charger Meeting: this time the presence was very high, infact there was 6 Charger (included the last oncoming). The next time, I think the meeting will be still larger!!

Posted by: Fabiano on Thu 7/26/2007 11:0600


Another detail on the Traveller and 3 new cars

   Finally, yesterday it's arrived another little package with the fire extinguishers I won on eBay. Now my Traveller, with this distinctive feature, is more similar to the original one. I have also unlocked the doors, so now it's possibile to open the doors and look the interior parts.

   Moreover, yesterday I visted a gentleman that I know on eBay and that lives near my town. Cristiano (this is his name) is a british car restorer but also a great diecast collector (on his body shop he has about 4000 pieces!!!). I visited his body shop and for the occasion I bought for few euros 3 models that I will restore in the next weeks: a black Dodge Viper R/T 10 (I will recreate the car used in the TV series "Viper"), a red Jaguar E-type Coupe (I will recreate the car used by "Diabolik") and a red Ferrari 348 GTB (I will restore it but I think I will sell it on eBay).

Posted by: Fabiano on Fri 7/27/2007 09:5800


New Works in Progress

   Yesterday, I started to work on 3 models: first of all, I created the correct license plates for the Traveller #2 (using some original pictures posted by Erik Dimitriou on CGLFC forum) and then I started to remove the paint from the Jaguar and Ferrari bodies. This evening, I think I will start to paint the Jaguar body with a good gloss black and then I will remove paint from the Viper body.

Posted by: Fabiano on Tue 7/31/2007 11:1600


The Jaguar has a new dress

   Finally, I restarted to work on the Jaguar E-type: I painted the internal parts and the body! I colored the internal chassis with a wonderful opaque black and the engine with a shine metal paint. However, the interior is not finished because I need to add more details to the stearing wheel, to the seats and to the dashboard.
   Moreover, I painted the body with a great gloss black: with this paint, the car is very very elegant, sporty and shiny!! Also on the body, I need to add some details, especially the chrome profiles. This evening I will continue to work on it, so tomorrow I will post some new updates!!

Posted by: Fabiano on Thu 8/2/2007 11:3101


Diabolik will be happy!

   Good news today! Finally I completed the interior: I painted the seats with the same tan color used for the Traveller and the dashboard with a opaque black. The combination (also with the stearing wheel) is perfect! I created other details for the interior: I painted the stearing wheel with a silver pen and then I added new instruments created with my PC; today, I will print another decal with the tachometer and the speedometer and this evening I will stick it on the dashboard.
   Besides, I created on the body (with the usual silver pen) the chomed profiles. At the end, I only tested every parts to see how the car will looks like, and I think that the result is very good!! I believe that this evening Diabolik will be very happy for his new car

Posted by: Fabiano on Fri 8/3/2007 09:2400


Jaguar completed!!

   Finally the Diabolik's Jaguar is completed!! I finished to assemble all the model and now looks great with this new colouring. To increase the details level, I added some decals to the dashboard (now it's more realistic respect the originals used by BBurago). I need only to add the handbrake but I will do it in the next days (I'm doubtful, because I don't know if paint it with black paint or brown paint). However, looks all the pictures of my last creation!

Posted by: Fabiano on Mon 8/6/2007 10:2000


My R/C "General Lee"

   Hi guys! Today, I want to show you my R/C "General Lee": it was produced by Hitari, it has "Dixie" horn and "Yeeeee Haaaaa" sound effects and it's very fast!! The original model has only a flaw: there wasn't the front and rear license plates. So, with my usual PC, I created a rebel flag for the front and the famous "CNH 320" for the rear. Now, looks very good!! In the next days, I will prepare some videos about this General in action

Posted by: Fabiano on Tue 8/7/2007 12:1500


Now it's the turn for the Viper and the new Dodge Charger!

   When I finished the Diabolik's Jaguar, I started a new project: unfortunately, it's not the Traveller #2 (I'm waiting some detailed pictures from Erik to create a perfect replica of his car), but the Dodge Viper used in the TV series "Viper". To replicate it, I used an old black Viper I bought for few euros 2 weeks ago, and after a good paint remover, I started to paint it with red paint. At now, I painted only the hood, the trunk, the rollbar and the 2 doors; moreover, I prepared with the PC a correct license plate.
   In the next days, I will finish to paint the rest of the body, and then I will prepare some accurate decals for the interior to reproduce the technological instruments located in the dashboard.

   Moreover, this morning I saw these awesome pictures posted by Bugsy and Motorhead on CGLFC message board. On these pictures, there is the new Dodge Charger produced by RC2/Joy Ride/ERTL (the maquette, certainly) and I can only say that this time the model is perfect (correct rims, trunk that can be opened, accurate engines, etc.) There is also a pre-release General Lee with test color, without tampos... I can't wait!!! I want this General!!!

Posted by: Fabiano on Wed 8/8/2007 09:3200


The Viper in Red

   Before the break on the weekend, I finished to paint all the Viper's body. The result is perfect and the paint is bright and without imperfections: the Viper will be reassembled monday evening, also with all the decals on the dashboard. So, finally, I will start to work on the Traveller owned by Erik Dimitriou.

Posted by: Fabiano on Fri 8/10/2007 10:1800


The Viper starts the engine!

   New week, new updates! This morning I want to show you the progress on the Viper. It's almost finished, but I need to add some little details to complete perfectly the model. I assembled all the body parts and then I added the decals for the dashboard, so the interior is very similar to the original car used for the TV series. I think this evening I complete this model and then I will start the Erik's Charger.

Posted by: Fabiano on Mon 8/13/2007 12:3800


Erik's Traveller: the beginning

   Finally, yesterday I started to work on the Traveller model based on the car owned by Erik Dimitriou and used in "Collier & Co." movie. First of all, using the pictures furnished by Erik, I created a new license plate, so now it's identical to the last one installed his owner. Moreover, I started to remove the paint from the body, starting from the hood and the doors.
   This evening I think that I'll continue on the rest of the body, and in the next days, I will start to paint it with the correct colours.

Posted by: Fabiano on Thu 8/16/2007 11:3200


First color on the Traveller

   Yesterday, I went to Gavirate (VA) in my preferred paintshop and I found all the correct colors to paint the Erik's Traveller. On to the road to home, I was very anxious to try my new paints, so just arrived in my house I immediately tryed to paint all the parts unpainted. The result is good: the light grey is perfect and it looks like the color on the pictures sent me by Erik.
   This evening, I will continue to work on the body and in the next days I will show you the progress. Have a nice weekend!!!

Posted by: Fabiano on Fri 8/17/2007 11:0200


A new partial skin for the Traveller

   Finally, today I resumed the Traveller: I removed all the old paint from the body and then I painted the front with the same color (light grey) used for the hood and the doors. Then, changing the mask, I painted the passenger side with a redish color: I'm very excited for the result obtained, but unfortunately today it's a rainy day and to show you my progress, I shot some pictures indoor, so the light is not perfect. I hope tomorrow will be a better day, perhaps a sunny day, so I will shoot new pictures with the right light.

Posted by: Fabiano on Mon 8/20/2007 22:5700


Another color for the Traveller

   Yesterday, I painted the body with the dark grey: to do this, first of all I prepared a mask to cover the parts just painted, and then I sprayed the new color on the visibile parts. After some hours, the paint was air-dried, so I removed all the mask and I shot some pictures with all the parts assembled.
   However, if you notice, there is a little difference between the light grey used on the front and the light grey used on the hood and the doors. I don't know the reasons, but I don't like this imperfection, so today I will repaint another time the hood and the doors and I hope this time the paint effect will be the same for every piece. Moreover, I will paint with the same color also the trunk and tomorrow, perhaps, I will paint the roof with a semi gloss black.

Posted by: Fabiano on Wed 8/22/2007 10:2000


The Traveller goes in Holiday!!

   As promised, I resolved the problem about the differences on the light grey parts: now every pieces have the same shade!! Moreover, I painted also the trunk with the same light grey and then I assembled all the parts with also the front lights and the rear lights.
   I think that until the 4th Septmber I will stop to work on the Traveller because tomorrow I will leave for my due holiday. However, in this period I will think how to create the roof, because I want try to create the vinil roof with a particular tapes... See you in September!!!

Posted by: Fabiano on Thu 8/23/2007 11:2100


Traveller has been improved!

   Finally, after the holiday, I took in my hands the Traveller and I corrected some errors I discovered watching carefully the pictures sent me by Erik.
   First of all, I repainted all the front grill removing the wrong orange frame: now the headlights grill is all black with silver edges. Then, I modified the left rear corner: in my previous version, I painted this point with dark grey, but now I've corrected it with a light grey. Last but not least, I corrected the hidden side of the right rear quarter panel, painting it with red color, instead of light grey.
   Now the car looks better and the next step is to paint the roof, giving it the look of a vinal roof.

Posted by: Fabiano on Thu 9/13/2007 10:4900


Finally, the roof!

   As announced, yesterday evening I painted the roof. To obtain the vinal effect I used a opaque black paint: I sprayed the paint with a lot of little squirt, manteining the cylinder at 40cm from the model. For every squirt, I generated a thick cloud, so the paint was deposited in granular way on the body.
   I think that the result is awesome and I'm very proud for my job... The next step is to create the silver profiles around all the windows and then, when the exterior will be finished, I will start to prepare the interior of the car.

Posted by: Fabiano on Fri 9/14/2007 11:2900


Look the Traveller!

   Today, "Collier & Co. - Hot Pursuit" will be realesed in the US on the new version with 2 DVDs. So, to celebrate this event, yesterday I worked hard to finish the exterior of the Traveller: I painted all the silver profiles around every window and then I assembled some external details like the windscreen, the back window, the fuel cap and the windshield wipers.
   Moreover, I shot some pictures with the orange Traveller that I created some months ago, so I tryed to reproduce a future meeting between the cars owned by John Schneider and Erik Dimitriou.

   Besides, I want to show you a custom "General Lee" that Luca.77 (an Automodellando's user) has created in this period: he has used an Hot Wheels model in 1/64 scale and using some pictures downloaded from Internet, he has created a perfect "General Lee" livery in miniature. Good job Luca!!

Posted by: Fabiano on Tue 9/18/2007 11:1400


Another "Collier & Co." meeting

   Yesterday, on the Traveller, I added the lateral rear windows, created using vinyl acetate papers. Now I think the exterior could be considered finished: I need only to fix every part to the the main body and then I will start to work on the interior. Moreover, this morning, I organized another little meeting with all the main cars used in "Collier & Co. - Hot Pursuit": yes, this time there is also the Shelby Series-1 I bought some weeks ago. When I will finish the Traveller, I will try to substitute on it the red stripes with the correct blue stripes.

Posted by: Fabiano on Wed 9/19/2007 11:2700


Under the body

   Yesterday, I started to work on the Traveller's core!! I dismantled all the model and I started to paint the chassis with a opaque black color. This evening, I will continue to work on it, and I think I will paint the engine.

Posted by: Fabiano on Wed 9/26/2007 12:1000


3, 2, 1... ignition!!

   As promised, I worked on the engine. First of all, I painted the block with a gloss red, and then I painted some details with a chrome paint. To increse the detail of this engine, I prepared some decals "MOPAR PERFORMANCE" for the headers. To complete it, I will add some cables and other feature in according with the picture of the real car.
   Moreover, I painted with the same gloss red, the torsion bar (so now it looks more real) and I prepared 2 new exhaust tubes, using the same drinking straw I used on the previous Traveller.

Posted by: Fabiano on Fri 9/28/2007 15:0300


Dashboard inside

   New updates on the Traveller: with a tan color, I painted all the internal parts like the dashboard and the lateral door panels. Then, I prepared a dashboard decal using the pictures sent me by Erik (below, you can see the usual animation I use to illustrate the steps needed to create this decal).
   In the next days, I will work on the internal floor: I need to decide if I will realize the movie version (no carpet inside) or the actual version (with tan carpet inside).

Posted by: Fabiano on Mon 10/1/2007 14:2700


My last purchases!

   This time, I want to present you my last purchases. The first 2 cars concern the movie series "007, James Bond": a Lotus Esprit Turbo (submarine) from "The spy who loved me" and an Aston Martin DB5 from "Goldeneye", both produced by RC2/ERTL. The last car concern the TV series "Magnum P.I." and it's a red Ferrari 308 GTS produced by Kyosho.
   I hope you appreciate them.

Posted by: Fabiano on Tue 10/9/2007 12:3000


Generations

   Today I want to show you my last purchase: the dirty version of the rare 1970 Dodge Challenger from the movie "Vanishing Point". Considering that in my collection there is also the new 2006 Dodge Challenger Concept, I organized a little comparison to show how a car can change in 36 years!!

Posted by: Fabiano on Mon 10/22/2007 12:0900


A Man and His Dream

   After Halloween, a new model has arrived in my house: this time is the turn of the Tucker Torpedo (Kyosho), a particular car produced in the 1948 by Preston Tucker in only 51 items. The story of this car is incredible: Preston Tucker took a different tack, designing a safety-conscious car with innovative features and modern styling. His specifications called for a rear engine like Porsche, disc brakes, fuel injection, the location of all instruments on the steering wheel, a windshield that popped out in a collision and a padded dashboard. It featured a directional third headlight, dubbed the "Cyclops Eye", for use in turns, in a fashion similar to the prewar Czech Tatra T87 (the Tatra cars also had a rear mounted, air-cooled engine and advanced streamlining): it lit up whenever the car was steered by more than 10 degrees, a feature now known as Adaptive Headlights.
   The Tucker story and legacy were recounted in the 1988 movie, Tucker: The Man and His Dream. Starring Jeff Bridges, the film was produced by George Lucas and directed by Francis Ford Coppola, who owns one of the 47 remaining Tuckers in existence (the 1003, sold at auction in September 2005 for $385,000).

Posted by: Fabiano on Fri 11/9/2007 11:3400


Another Steve McQueen's car

   Finally I received one of my last purchases, the wonderful Porsche 917K used by Steve McQueen in the movie "Le Mans". This model is produced by AutoArt and the details are very high, in according with the tradition of this brand. The Porsche 917 is a racecar that gave Porsche its first overall wins at the 24 Hours of Le Mans in 1970 and 1971. Powered by the Type 912 flat-12 engine of 4.5, 4.9, or 5 litres, the long-tailed version was capable of a 0-62mph time of less than 2.5 seconds and a top speed of over 248 mph (394 km/h).
   Besides the Le Mans (film), another well-known appearance of the 917 in movies was in Herbie Goes to Monte Carlo. Driven by Bruno von Stickle (Eric Braeden), and painted in the colors of Germany's national flag, it was perhaps the most formidable entry in this fictitious Trans-France Race. The car shown in the movie was obviously not a real 917, though, but a very fine replica, the US produced Laser 917. As it is based on many components from a VW Beetle including chassis and engine, it has a stunning (for a grass roots kit) resemblance to a true 917.

Posted by: Fabiano on Tue 11/20/2007 10:2200


The Grease Lightning

   New week, new model!! Today, I would like to show you the Grease Lightning, alias the last car I bought some days ago: the car is very strange and it's not my preferred for the design, but it's a great movie car, so it can't miss in my "virtual" garage. However, I like very much the transparent hood with the engine on sight: a classic modification used in the '60 cars!! The real car was prepared by the great George Barris for the movie "Grease" and in the May 2005 it was sold during a cars auction.

Posted by: Fabiano on Mon 11/26/2007 11:3300


Working on the Traveller...

   Finally, after 2 months, I resumed to work on the Traveller (owned by Erik Dimitriou). The exterior now is perfect, so I'm concentrating my pains only on the interior, especially on the internal carpet: infact, using a particular pasty velvet sent me from Max (Diablo), I recreated a perfect carpet for the floor. This is the first time I use this technique, so I need to improve me, but considering the final result, I'm quite satisfy. In the next days, I will paint the seats using the correct paint and then I will try to reproduce the plaids that cover them.

Posted by: Fabiano on Wed 11/28/2007 15:1600


Sometimes they come back!

   Working on the Erik's Traveller and watching the result obtained with the interior, I decided to make the same modification on the John's Traveller... So, I cleaned-up all the floor (removing all the painted talc) and I created a "moquette" effect with the same pasty velvet: the only difference is the color, because this time I used a black velvet, like the real car.
   Clicking on the following pictures, you could watch the final result: I hope you like it!!!

Posted by: Fabiano on Fri 11/30/2007 14:2800


007 Die Another Day

   Finally, after the great strike organized by the italian truck drivers, I received some models: one of these, it's the beatiful Aston Martin V12 Vanquish used by Pierce Brosnan in the 007 movie, "Die Another Day". The model is produced by RC2/ERTL and, like the real Vanquish, also this model has some particular gadgets: machine guns, rockets, removable roof, etc.

Posted by: Fabiano on Tue 12/18/2007 11:3700


Project "Lee 1"

   Yesterday, I started to work on another model: with an another General Lee I want try to create the "Lee 1", the very first General Lee ever created (it's famous because it's the General Lee that appears at the end of every theme song).
   First of all, I started to create the CB antenna: to do this, I used a simple eraser and using the cutter, I modeled the correct shape to create the base; then, using a bristle taken from a broom, I painted it with chrome paint to create the rod. Moreover, using Paint Shop Pro, I created the cross flags decal and I attached it in front of the CB antenna (remember that the "Lee 1" belong to the "Georgia Era", so it has this decal near the back window). For last but not least, using 2 original ERTL rollbars, I created a full rollcage following the shape used in the real car: the result is perfect and this evening I will paint it with the correct color and then I will continue to work on the interior. Enjoy with the pictures!!!

Posted by: Fabiano on Wed 12/19/2007 11:5100


Merry Christmas and a Happy New Year!

   Finally, I painted the full rollcage: I shoot some pictures putting it into the car and the result is very very good: I like it very much and I'm very satisfied!! Moreover, I removed the chrome profiles on the lateral mudguards (like the original "Lee 1") and I added some decals: in particular, I added the rear license plate (the famous "CNH 320"), the front rebel flag and the Warner parking authorization on the windscreen.
   Unfortunately, this post will be the last for the 2007: today I will leave my town to spend the Christmas holiday with my family and my girlfriend. I will come back in the first days of January, so I want to use this occation to wish you a Merry Christmas and a Happy New Year!!

Posted by: Fabiano on Thu 12/20/2007 10:4700


Other updates on the "Lee1"

   Finally, after a long Christmas holiday I resumed to work on the "Lee1". First of all, I tryed to improve the rims: I created for every wheel a circular mask, and then I painted the uncovered zone with black mat. Later, on every wheel, I painted some parts with a silver drawing pen to create the correct effect created by the "American Vectors" on the real car. Terminated to work on the wheels, I started to work on the lateral rockets and on the internal chassis: to modify these parts, I used some "plasticard" A4 papers. With a pen I traced the correct shapes I needed and then with the cutter I cut the contour. In the end, I attached all the plastic parts on the chassis to recreate the correct structure and then I painted all the chassis with a gold/bronze color.
   Unfortunately, in this period is snowy, so I can't take good pictures of the model: I need to wait until the sun will come back, so go back ASAP to visit my site!!

Posted by: Fabiano on Fri 1/4/2008 11:4100


The "Lee1" is taking its shape...

   In these days, I worked hard on the "Lee1": first of all, I created the lower console using the plasticard and then I painted it with a tan color (today I will realize a decal with the wood texture for the top part). Moreover, with a lot of fear, I corrected the ride height: to do this, I cut about 2mm from every suspension, but now the result is perfect: now the car seems to have a lowering kits and it's seems more aggressive. Subsequently I painted all the chassis with a gold color: naturally, I painted the engine compartment too so in the next days I will work on the engine. At the end, I created a new front push bar: to do this, I used the original leading edge, and then with the plasticard I recreated the correct shapes; after a good paint, I mounted it on the model and the look is great! That's all, so... enjoy yourself with the new pictures!!!

Posted by: Fabiano on Mon 1/7/2008 11:4900


A crazy project begins!

   As announced some months ago (June 2007) one of my wishes is to create a "Street Hawk" replica on 1:18 scale. So, after a long period in which I worked on 3 Chargers (Traveller #1, Traveller #2 and Lee1), I've decided that now it's the right time to start this project: indeed 2 days ago I started to work on this bike (I'm using as base an Honda XR400 produced by Maisto) so I created the front nose layouts with a simple paper, then I will round off them and when every layout will be ready, I will create the same shapes on a plasticard sheet. I hope you like it!!

Posted by: Fabiano on Wed 1/9/2008 15:0600


Only few updates

   Others little updates on the "Lee1": I added a decal on the dashboard to reproduce all the car instruments. Moreover, I started to work on the engine: I'm trying to create with the plasticard the filter cover; when it will be ready, I will paint it with black mat and then I will put on it a decal with the brand "FOUR BARREL".
   Lastly, I continued to work on "Street Hawk", trying to create the lateral layout: in the next days, I will correct some little defects and then I will create the same shapes with the plasticard.

Posted by: Fabiano on Thu 1/10/2008 17:3600


Little steps on the "Lee1" engine

   Step by step, the engine go ahead... I finished to prepare the air filer (black mat paint with the "FOUR BARREL" decal) and then I painted all the parts with an orange paint. Now, I need only to add some details, like the wirings, then when I will finish it, I will put it on the engine bay and I will try to recreate the famous jump in front of the Seney Hall.

Posted by: Fabiano on Tue 1/15/2008 12:3400


My next projects

   Finally, after one month, I received the last 3 models I ordered in December. The first model is a 1971 Plymouth Road Runner produced by ERTL (limited edition 1 of 2502): this model will became the car used by Daisy Duke in the first episodes of the TV series "The Dukes of Hazzard". The second model is a 1969 Dodge Charger produced by Johnny Lightning (I bought it in France): this model will became the second car used by Kurt Russel (Stuntman Mike) in the movie "Grindhouse: Death Proof". The third model is a 1970 Chevy Nova SS produced by Maisto: this model will became the first car used by Kurt Russell (Stuntman Mike) in the movie "Grindhouse: Death Proof".
   I will start to work on these models in the next days.

Posted by: Fabiano on Thu 1/17/2008 11:3600


Street Hawk continue

   Waiting to work on the models I show you yesterday, I worked on the "Street Hawk" bike: first of all, I removed all the original paint from the body and then I started to prepare the new body with the plasticard sheets. As you can see, initially I created the front nose, and then I created the lateral parts. They need some adjustment, but I think I'm on the correct way!!
   The next week, I will continue to work on the new body, creating the rear part and the contour around the saddle. Have a nice weekend!!!

Posted by: Fabiano on Fri 1/18/2008 09:5400


The engine is almost finished

   In these days I'm working on the "Street Hawk" bike, but I found the time to work also on the Lee1's engine. I added some details, in particular some wirings and then I installed it on the engine bay. However, the model it's not finished: I need to add other distinctive features to the engine, like the car battery and the water tray. Moreover, I will substitute all the decals with a new correct set.

Posted by: Fabiano on Wed 1/23/2008 16:4500


Street Hawk: new updates!

   Other updates on the "Street Hawk" bike! I finished to create the body with the plasticard and then I painted the bike with a metallized blue (it's an awesome color because it changes shade with different lights). To do this, I painted 2 coatings: when the paint will be perfectly dry, I will add the lateral decals and a lot of other details. Moreover, in the next days, I will work on the chassis, painting it (and the engine) with a mat black paint. Then will be the turn of the rims: I will paint them with a gold paint.

Posted by: Fabiano on Fri 1/25/2008 14:1500


Street Hawk again!

   Today it's my birthday and to celebrate it, I will publish some new pictures of the "Street Hawk" bike. As you can see, I added the decals on the lateral parts and then I painted the chassis and the engine with a mat black paint. Finally, I added a blackened glass on the front nose. This evening, I will paint the rims with a gold paint and in the next days I add other decals on the keel.

Posted by: Fabiano on Tue 1/29/2008 15:4800


This car will be "Death Proof"

   Waiting to finish the "Street Hawk" bike, I started a new project, the '70 Chevy Nova used in the "Death Proof" movie. I bought this model the last December, but only this week I found the time to work on it: first of all, I dismantled the model, then I removed all the paint from the body. Afterwards, I painted the body with a mat black and then I added a big white skull on the hood. At the end, I replaced the stearing wheel and the driver's seat with a new racing set.
   However, in the next weeks I will work to finish the exterior and I will start to work on the interior, creating the full roll cage and all the others internal details.

Posted by: Fabiano on Tue 2/12/2008 15:0301


Little updates on the Nova

   Other few updates on the "Death Proof" Nova: I prepared the license plate (remember: the license plate on this car is JJZ-109. This is the same license plate number that was on the 1968 Ford Mustang Fastback that Steve McQueen's character drove in the 1968 movie "Bullitt"). Moreover, I added the sidemarker lamps and the frontal directional lights. I hope you like it!!

Posted by: Fabiano on Wed 2/13/2008 11:1101


The Road Warrior

   Finally, I received one of my last purchases, the awesome Ford XB Falcon (called "The Road Warrior") used in the movie Mad Max: this model is produced by AUTOart and the details level is very high! The paint job is perfect (with a good contrast between the gloss and the mat black), the interior parts are precise, the engine is highly detailed with chrome parts and accurate wirings. Moreover, with the diecast models in the box are included some additional items, like a dog, 2 fuel tanks, a fifth wheel and some dog-food tins.
   In my opinion, it's the best diecast model I bought in this year: ok, it's not cheaper, but if you want a good TV/movie cars collection, you need to buy it!!!

Posted by: Fabiano on Thu 2/21/2008 11:4501


The Deathmobile is arrived!

   A new arrival at home: this time is the turn of the funny "Deathmobile", the Lincoln Continental used in the movie "Animal House", with John Belushi. When this model was produced by ERTL I decided to wait because it wasn't one of my favourite movie cars, but in the previous weeks, searching on eBay, I found a great occasion: the model was proposed with a very low price, so I bought it immediately and today it's parked in near to my other diecast models!

Posted by: Fabiano on Mon 2/25/2008 12:0900


At last... the 1966 Batmobile!!

   Yesterday, I received the new 1966 Batmobile produced by Hot Wheels. This is the normal version, not the Elite or Super Elite versions, but I need to say this model is good. The shape of the body is perfect and the details are adequate. The paint is nice but in some points the red lines are not accurate (especially on the top of the rear turbine). An other fault is the opening system: only the lateral doors can be opened, while the trunk and the hood are sealed up... it's not a great result for a 1:18 diecast model...
   However, the model is very good (especially considering the quality/price ratio) but I think I will substitute it with the Elite version when will became available. For the moment, the new Batmobile is seated next to the other my 2 Batmobiles ("Batman" and "Batman Begins" movies").

Posted by: Fabiano on Tue 3/4/2008 17:0000


007 Casino Royale

   This is the last arrival in my collection: the Aston Martin DBS produced by RC2/ERTL. This is the car used in the last "007" movie, "Casino Royale". The shape of the car is good, the paint is very brilliant and some details are great, especially the interior parts and the engine. The only things I don't like are the slits around the hood and the rigid suspensions (instead the DB7 produced by RC2/ERTL has soft suspensions). However, the model is great and it will keep company to the others four "007" cars I have in my collection.
   Lastly, I would to thanks Giuseppe Visconti, my main supplier: he has assisted me during these 2 years and he will close his diecast business in the next weeks.

Posted by: Fabiano on Thu 3/6/2008 10:4100


Analysing the Hemi Cuda

   Ok, now it's the time to show you my last purchase, the '71 Hemi Cuda used in "Nash Bridges" and produced by Highway 61. I can use only a word to describe you this model: AWESOME!!!! This diecast has an incredible details level, on the exterior but also on the interior. The paint is perfect: the "curious yellow" is smooth, bright and faults-free; the engine is highly detailed, it miss only the noise (it's incredible the method used to open/close the hood, with real springs); the rims are accurate and the model has working suspensions.
   The interior seats are realized with soft plastic (to simulate the skin) and the interior is embellished with a lot of details like the safety belts, the reclining seats and a fine carpet.
   Finally, I think this is one of the best diecast model in my collection and considering its rarity, I will take care of it!!!


   Moreover, waiting the oncoming of mine, I received these wonderful pictures from Robby, where we can see the new Authentics General Lee, distribuited in these days from RC2/ERTL. When my General Lee will arrive, I will create a complete photo session comparing the new General Lee with the old one.

Posted by: Fabiano on Wed 3/19/2008 14:4800


The new General Lee!

   Finally, this morning I get my Authentics General Lee. The model is incredible: it's completely different respect the old one and the details are very high. The paint job is perfect: the orange is bright and smooth and there are no faults. The window's profiles are not painted but they are realized with chromium-plated plastic (so, they look more realistic). On this version, the rims are very accurate: the design is perfect and they don't seem "toy" rims like the old General Lee. Also the front and the rear parts are changed: on the front we find revolving lights, while in the rear we find real plastic lights (not painted).
   The greatest update on this model is the trunk: on the old version, it's binded with the body, while in this version it can be opened. Indeed, in the trunk we can found a fifth wheel and some other tools. However, to see another great update, we can open the hood: now, on the engine bay, there is an amazing 440 Magnum engine, very detailed, with a lot of particulars, like the wirings, the battery, the air filter, etc. At last, the interior is completely changed: RC2/ERTL used a different plastic to realized the dashboard and the seats and it appears more realistic. Like the rest of the car, also the interior has been enriched with a lot of details, like the safety belts, the lower console and, finally, the rear seats!!!
   However, this is only a fast review of this model: tomorrow I will publish a complete comparison between the old and this General Lee, like the comparison I realized some months ago with "Herbie" diecast model.

Posted by: Fabiano on Wed 3/26/2008 12:2200


Saga completed

   These models are not novelty, but I received them in the last days: the first one is the DMC DeLorean used in the movie "Back to the Future"; the second one is the DMC DeLorean used in the movie "Back to the Future 3". With the other DMC DeLorean from the "Back to the Future II", now I completed the 3 cars used in the "Back to the Future" saga. I know there is another version on railroads, but I don't if I will buy it in the future. For the time, I enjoy with them.

Posted by: Fabiano on Sat 5/10/2008 15:4200


The Coyote X

   Waiting my last purchase, today I want to show you an unusual model of my collection, regarding the TV series "Hardcastle & McCormick". Considering not even one has produced this car in 1:18 scale, I bought this 1:10 model... yes, the accuracy is not high, because this model is only a toy (produced by ERTL in the 1982) but it's a rare model and it's not easy to find a model like this in good condition, so I'm happy to join it with the K.I.T.T. produced by Kenner.

Posted by: Fabiano on Sat 5/17/2008 09:4800


Other details on the Lee1

   After a long period, I resumed to work on the "Lee1", infact the model is not yet finished: I need to refine the engine bay adding some details. So yesterday, I painted with black gloss the front traverse like the real "Lee1" and this evening I will paint the orange stripe on the front grill and then I will add other details like the wirings and the battery.

Posted by: Fabiano on Wed 5/28/2008 15:2200


Lee1: The Neverending Story!

   As promised, yesterday I corrected other details on the "Lee1". First of all, I painted the front grill with gloss black, then I corrected the edges of the front light's grill: curiously, ERTL produced this model with orange outlines and this is not correct. So, with a lot of patience I accomodated this error.
   The next weekend I will go in Verona to meet my girlfriend, but the next week I will continue to work on the Lee1, especially on the engine. Have a nice weekend!!

Posted by: Fabiano on Thu 5/29/2008 10:3900


A new antenna for the Lee1

   In this period, I started to work hard on my models (I'm working on the Lee1 and on the 2 Travellers but this time I will show you only the progress on the first one). In particular, I created the front radio antenna located on the hood side. To do this, I used a bristle catch from a broom, then I painted it with a silver paint. The result is good and finally I can say that my Lee1 is complete on the exterior... Now I need only to complete it, finishing the engine bay.

Posted by: Fabiano on Thu 6/5/2008 12:0800


Perfection is impossible

   In the last weekend I worked a lot on my models (especially on the Travellers) but today I will show you only my last update on the Lee1: watching some pictures of the real car, I noticed I forgot to add some chromed profiles (normally used with the vinyl roof). So, using plasticard I realized 4 thin stripes and then I painted them with silver paint. I hope you like the final result!!

Posted by: Fabiano on Mon 6/9/2008 11:4602


The Traveller has changed its "shoes"

   As promised, today I will show you the last progresses on the 1st Traveller I created. As you can see watching the pictures, I modified this model in the following parts: 1) rims appearance, 2) suspensions height, 3) new air filter and 4) vinyl chrome profiles. Now, the model looks better!! In the near future I will show you the progresses on the other Traveller.

Posted by: Fabiano on Wed 6/11/2008 12:2702


I am Legend

   Finally, today I will show you the awesome Shelby Mustang GT500 produced by AUTOart. The details on this diecast model are grand: you can watch it in the following pictures, but you will realize this model has no defects. Moreover, this model is a limited edition of 6000 pieces (mine is the #2044) and in the package there is a Certficate of Authenticity. Every time I bought a model produced by AUTOart, I think this producer is one of the best on the world!!

Posted by: Fabiano on Fri 6/20/2008 12:2002


6 mm less!

   Waiting the first pictures from the Dukesfest 2008, I finished to work on the wheels mounted on the grey Traveller, the replica of the car owned by Erik Dimitriou. As you can see from the pictures, I modified the model as the other Traveller, reducing the suspensions height and the rims colouring. Now, this model is ready for a "virtual" Dukesfest... Stay tuned for a funny surprise!!

Posted by: Fabiano on Thu 6/26/2008 15:5600


Traveller & Traveller

   In this period, I'm working on the Traveller #1 (the car used in the movie "Collier & Co.") To create a perfect replica of the real car, I tryed to recreate the cover seats: in the movie they used 2 blankets, while I used 2 old duster cloths. However, the diecast model is not yet finished: I need to complete the engine bay and I will other details on the interior, etc.
   Anyway, I shot some pictures with the 2 Travellers, in order to appreciate the work executed in the last year. Enjoy with them!!!

Posted by: Fabiano on Tue 7/15/2008 12:0500


Dirty Mary Crazy Larry

   During the last weekend, I received a visit from my parents, so I had to forsake the idea to visit the Ecto1 in Milan. However, when my parents went to home, I started to work on my new project... yes, another General Lee is finished under my hands, but this time with this model I will realize the '69 Charger used in the movie "Dirty Mary, Crazy Larry". First of all, I changed the original wheels with 4 new wheels taken from an old Ford Gran Torino; moreover, I created 2 new broochs for the doors, so now it's possible to open them.
   Instead, yesterday evening I have removed all the plastic parts from the shell and then I have applyed a paint remover on the body and now it's ready for the painting. Coming soon I will post new picture about my work in progress.

Posted by: Fabiano on Tue 7/22/2008 10:5700


DMCL's Charger with the primer

   During this weekend I made few steps on the Dirty Mary Crazy Larry's Charger, infact I have only painted the shell with the primer. Now the body is ready to receive the correct yellow lime paint and this evening I think I will appy on it. Come back tomorrow for new updates!!

Posted by: Fabiano on Mon 7/28/2008 11:5200


DMCL's Charger with the new paint

   As promised, yesterday I've painted the Dirty Mary Crazy Larry's Charger shell with the correct yellow paint and this morning I've assembled all the parts (chassis and interior included) to understand how it appears with the new look. This evening I will work on the interior: I will paint every component with mat black and then I will coat the floor with black velvet. Stay tuned!!!

Posted by: Fabiano on Tue 7/29/2008 11:1400


Other details on the DMCL's Charger

   Today I will show you only few updates on the Dirty Mary Crazy Larry's Charger: infact, yesterday I've worked especially on the dashboard and the door panels (painting them with a black paint). Moreover, with a silver drawing pen, I've outlined the window profiles. This evening I will continue to work on this model, adding more details to it!!

Posted by: Fabiano on Wed 7/30/2008 09:5700


Two stripes on the shell

   During the last weekend I've added the lateral stripes on the Dirty Mary Crazy Larry's Charger. I designed these stripes with Paint Shop Pro and then I printed them on decals paper. I'm satisfied about the result obtained and to increase the details, I've added the CB antenna on the right side of the roof. In the future days, I will continue to work on the interior. Enjoy with the pictures!!

Posted by: Fabiano on Mon 8/4/2008 12:0804


DMCL's Charger with its new seats

   Today is my turn: yesterday, I've finished to paint the internal seats of the Dirty Mary Crazy Larry's Charger. As you can see, I've removed the headrests from the front seats and the next step will be to put a black velvet on the floor... but now, I take a break for 3 days for a short holiday.
   See you the next week!!! Have a nice mid-August holiday!

Posted by: Fabiano on Thu 8/14/2008 11:3400


Another improvements on the Traveller

   For me, the diecast models I create are never finished: every time, I try to increase the details to improve the final output. This time, for example, I stole the idea used by Roberto and I made the same modify on my Traveller #1: I coated the stearing wheel with insulating tape and now it looks like more similar to the real one used in the movie "Collier & Co."
   Coming soon I will work on the chassis to improve the rear part: I will execute the same modify I applied on the Lee1.

Posted by: Fabiano on Thu 9/18/2008 12:2002


DMCL's Charger with a black carpet

   During the last weekend, I worked on the Charger used in "Dirty Mary Crazy Larry": in particular, I worked on the internal chassis, covering all the floor with a pasty black velvet, to simulate the real internal carpet. To complete the passenger compartment, I will try to create the internal CB transmitter then I will consider it finished. Stay tuned!!

Posted by: Fabiano on Mon 9/22/2008 17:1000


Finally... the General Lee "Hand Signed"!!

   Today I would like to show you one of my lastest purchases, the diecast model I consider the masterpiece in my collection: yes, I know it's the classic General Lee produced by ERTL, but this model is particular because on its shell is signed by the following members of the Dukes of Hazzard cast: Catherine Bach (Daisy), John Schneider (Bo), Tom Wopat (Luke), Rick Hurst (Cletus), Sonny Shroyer (Enos), James Best (Rosco) and the original designer of the car George Barris.
   Now, I need only to find a good rotating display case to show this diecast model on every perspective!!

Posted by: Fabiano on Thu 10/2/2008 15:3302


Bumblebee... on the Earth!

   Yesterday, I received a new car for my "little garage": this time, it's the turn of the new Chevrolet Camaro Concept produced by Jada. This wonderful yellow car has been used in the movie "Transformers" for the characters "Bumblebee". The diecast model is very nice: the paint is very bright and the exterior and interior details are great. The only defects of this model are the engine (too simple and too chromium-plated) and the front wheels that are not stereable (for a 1:18 diecast model it's unthinkable).
   However, I think it's a good diecast model and in the next future I will shot some pictures with the other 2 new muscle cars (the Dodge Challenger and the Ford Mustang). Stay tuned!!!

Posted by: Fabiano on Fri 10/10/2008 16:4402


WIP 1/64th General Lee: Step 1

   Thanks to this site, in the past months I met a lot of new friends with the same passion: one of these is Luca Ripamonti, the guy who has created a 1/64th General Lee starting from the '69 Dodge Charger produced by Hot Wheels. When I saw his little General Lee it was love at first sight, so he decided to create a new one only for me. Some days ago, he bought a new Charger and in the next weekend he will start to work on it, removing the current paint and adding the best color on the world... the orange!!
   When I will receive new pictures, I will publish his progress!

Posted by: Fabiano on Thu 10/30/2008 11:4000


WIP 1/64th General Lee: Step 2

   Luca sent me some new pictures about his "work in progress": now the '69 Dodge Charger has been unpainted and in the next days the original paint will be substitute with an orange paint. I can't wait to see it finished!!!

Posted by: Fabiano on Mon 11/3/2008 19:2002


WIP 1/64th General Lee: Step 3

   This W.I.P. proceeds very fast: this morning, Luca sent me other pictures about the '69 Dodge Charger he is preparing for me. In these pictures, the Charger has been covered with a grey primer and then it appears with its (final) orange uniform. The General Lee takes shape!!! The paint job is awesome and there are no faults on the surface: great job, Luca!!

Posted by: Fabiano on Tue 11/4/2008 12:4400


WIP 1/64th General Lee: Step 4

   Every day, an update... Today, Luca sent me some new pictures about my '69 Dodge Charger: as you cane see, he mounted (just for test) the shell on the chassis and then he added some details on the front grill and the rear panel (he used India ink for the black parts and nail varnish for the rear red lights). In the next days, he will change the wheels, he will add the decals and then he will detail the engine bay. We look forward to see the progress!!!

Posted by: Fabiano on Wed 11/5/2008 16:10011


WIP 1/64th General Lee: Step 5

   As promised, yesterday Luca modified my '69 Dodge Charger adding new wheels. As you can see from the pictures, he took the wheels from a Porsche Cayman produced by Hot Wheels and then he organized a little meeting with his General Lee. In the future days, he will works on the interior and then he will apply the decals on the shell.
   I'm very satisfied about the result obtained by Luca: with a good paint job and a lot of details he changed face to this model!!!

Posted by: Fabiano on Thu 11/6/2008 12:5601


WIP 1/64th General Lee: Step 6

   New week, new updates!! Luca sent me some new pictures about the 1/64th General Lee. He added a lot of details to this model: lateral lights, front and rear valance and an awesome push bar!! Moreover, he painted the chassis with mat black paint, leaving the exhaust pipe chromed.
   However, since tomorrow I will start to show you some of my last purchases in 1:18th scale (now I have a new supplier), so stay tuned!!!

Posted by: Fabiano on Mon 11/10/2008 12:1901


Beverly Hills, 90210

   As announced, today I would like to show you the first model of my last purchases: it's a 1964 1/2 Ford Mustang Convertible (with cream paint) and it's the car used by Brandon Walsh (Jason Priestley) in the '90 TV series "Beverly Hills, 90210". This diecast model is produced by Motormax and the level is very good. The shape of the car is perfect, the only defect is on the interior with inaccurate safety belts and wrong colour sunshades.
   I'm satisfied about this model especially for its good quality/prize ratio: I recommend this model for all the Mustang fans!!

Posted by: Fabiano on Tue 11/11/2008 19:3000


WIP 1/64th General Lee: Step 7

   Today, a lot of news on the 1/64th General Lee, the next little mascotte of this site!!! As you can see from the pictures, Luca added some details on the front and rear valance, two new license plate, but especially he started to work on the internal roll bar, created using a paper clip. An awesome job, especially considering the scale!!!

Posted by: Fabiano on Thu 11/13/2008 17:2200


WIP 1/64th General Lee: Step 8

   The little General Lee grows up: Luca sent me some pictures about his progress and I can only say he is doing a good job!! During the weekend he worked on the interior and on the engine. Moreover, he added chromed profiles on the shell, on the glass surfaces and then he created 2 new antennas. As you can see this General Lee looks like the LEE1!!

Posted by: Fabiano on Mon 11/17/2008 18:0701


WIP 1/64th General Lee: Step 9

   The little General Lee is almost finished: yesterday, Luca tryed to assemble the shell with the chassis and the result is great!!! This diecast model has a lot of details, especially considering it's only in 1/64th scale: look the chromed profiles, the engine bay, the full roll cage and the tiny antennas!!! In the last pictures you can see the General Lee with its final uniform, with the confederated flag on the roof, the "01" numbers on the doors and the crossed flags in front of the trunk (remember, it's the LEE1!!).
   In the next days, Luca will finish to assemble it and then he will send it to me. I'm very satisfied about the final appereance of this model.

Posted by: Fabiano on Tue 11/18/2008 11:3700


WIP 1/64th General Lee: Step 10 - THE END

   After 10 "episodes", the General Lee has been completed by Luca. Yesterday, he painted the interior of the chassis and then I created a special box for the shipping, using a plastic case and a lot of polystyrene. During the next weekend I think I will receive it and the next week I will realize a complete photo session for this awesome diecast models.
   Congratulations to Luca for his craft and I will be always glad to host his next W.I.P. on this site. Thank you very much for this gift, Luca!!

Posted by: Fabiano on Wed 11/19/2008 17:1602


The little General Lee is travelling to my house

   Tomorrow, the little LEE1 will arrive at my house, but today I received a lot of new pictures from Luca: he organized a little meeting with his first General Lee. As you can seen from the pictures, the graphics of his Lee have lost colour, so in the next days he will substitute all the decals. Enjoy with all these pictures and have a nice weekend!!!

Posted by: Fabiano on Fri 11/21/2008 16:4002


The new KITT is arrived!

   After a long period, where I showed you the W.I.P. about the LEE1 created by Luca, today I would like to show you some pictures about one of my last purchases, the nice Shelby Mustang GT500KR produced by Shelby Collectibles. As you can see, this is the car used in the new TV series "Knight Rider". However, In the next weeks I will try to customize it to create a good replica of the real K.I.T.T. So, stay tuned!!!

Posted by: Fabiano on Tue 11/25/2008 16:5504


Chrysler 300C Hemi

   Finally, after a lot of months, today I'm here to show you a new model of my collection: this time, it's not a car used in a movie or in a TV series, but it's the car I used during my last travel in the USA. The car is a blue Chrysler 300C and for now, I added only the license plate of the real car. In the future, I will continue to add details on this car, especially on the interior.

Posted by: Fabiano on Wed 12/3/2008 15:4004


WIP 1/64th Hazzard Police Car: Step 1

   The Christmas period is the best period for me: I have a lot of time to work on customization (if you remember, the last year I created the LEE1 in 1/18th) and also this year I started to work on some models... one of these is an old 1/64th Dodge Monaco produced by Hot Wheels (Temperature Color Changing Auto Paint). I will convert it into an Hazzard Police car and when I will finish it, I will use it in a diorama using the LEE1 created by Luca for me (this is only the first Police car, because I would like to use 2 or 3 Police cars in my diorama).
   However, during this first step, I dismantled the model and then I removed all the paint (a quick process considering the dimensions). Waiting to find the correct white paint, I substituted the old wheels with a new set taken from a Corvette, the donor car. During the next days, I will paint the interior and the shell.

Posted by: Fabiano on Tue 12/9/2008 12:5105


General Lee: California version

   In the previous days, I started to work on the umpteenth General Lee: this time, I want try to create a latest California version. The first step was to create a new push bar, more larger: to do this, I cut the original one and using the plasticard I created the new lateral supports.
   After a good quantity of glue, I painted the new push bar with gloss black: so, watching the pictures you will see the comparison between my new push bar and an original one. Stay tuned for the updates!!!

Posted by: Fabiano on Wed 12/10/2008 18:0902


'69 Chevrolet Camaro Yenko S/C

   Today, I will show you the first car I bought from the movie "2 Fast 2 Furious": it's a '69 Chevrolet Camaro Yenko S/C produced by Highway '61. I bought this version, regardless of the model produced by ERTL, because this version is more detailed and it's more accurate. As you can see, the model has 4 openings (the trunk, the hood and the 2 doors) and the engine is awesome, very detailed!!
   The next week I will show you the other car from "2 Fast 2 Furious", the orange '70 Dodge Challenger R/T. Have a nice weekend!!!

Posted by: Fabiano on Fri 12/12/2008 11:4702


'70 Dodge Challenger R/T

   New week, new model: this afternoon, I want to show you the second muscle car used in "2 Fast 2 Furious", an awesome orange '70 Dodge Challenger R/T. This model has been produced by ERTL and it's similar to the same model produced for the movie "Vanishing Point". Otherwise, on this model there is a great set of alloy rims and a wonderful vinil roof (I like this peculiarity on american cars).
   Like on the "Vanishing Point" model, this car has a poor engine, too simple and with too much plastic. However, it's a good diecast model and it's a good partner for the '69 Chevrolet Camaro of the last week.

Posted by: Fabiano on Tue 12/16/2008 15:0700


WIP 1/64th Hazzard Police Car: Step 2

   This is the second "episode" of the 1st Hazzard Police car W.I.P.: as you can see I painted all the shell and the interior with a dark grey primer, then I painted the shell with a brilliant white. The result is very good (it's the first time I work on a 1/64th model).
   During the next days I will continue to work on it, applying the decals and adding some details.

Posted by: Fabiano on Wed 12/17/2008 11:4702


Back to the Future: models completed!!

   Before Christmas, I would like to show you another new entry, the last DeLorean DMC from "Back to the Future - Part III". With this car I completed all the diecast models created for this famous movies saga. The peculiarities of this model are the wheels: on this model there are installed 4 train wheels and into the box there is a rail to put the model. All the other characteristics are equal to the other 3 previous models.

Posted by: Fabiano on Sat 12/20/2008 10:0103


My next pre-Cooter's General Lee

   Today, I would like to introduce you the General Lee I show you the December 29th. As I told you, this is a gift received from the user "testarossa" and it's a damaged G.L.: as you can see from these new pictures, the bumpers are painted and crusted with grey paint, the rims are painted with a mat black paint and the interior are painted with a light tan color.
   Considering the large numbers of G.L. in my collection, this time I want try to create the pre-Cooter version used in the 2005 movie: to do this, I will chrome the bumpers, I will substitute the rims (on the passenger side, I just removed the old damaged rims to install the new rims), I will paint the interior with mat black paint and then I will try to damage the shell adding new graphics and some rust.

Posted by: Fabiano on Thu 1/8/2009 12:2404


Working on the front bumper

   As announced in my last post, yesterday evening I worked on the front bumpers: with a thin sandpaper I removed part of the grey paint and I tryed to level off the surface. Then, with a chromed paint I painted the front bumper and this morning I put the lights grill on it. I'm very satisfied for the result obtained, especially considering the initial conditions of this piece. During the weekend, I will try to do the same job on the rear bumper.

Posted by: Fabiano on Fri 1/9/2009 15:1202


Working on the rear bumper

   During this weekend, I worked on the pre-Cooter's rear bumper. As the front bumper, this part has been painted by the previous owner with a grey paint. So, I tryed to remove the crusted paint and then I painted it with chromed paint.
   The result is good, so the work to create the pre-Cooter General Lee continues.

Posted by: Fabiano on Sun 1/11/2009 16:4500


A clunker car

   In the last days, I worked on the pre-Cooter General Lee. First of all, I removed all the graphics from the shell using a simple nail varnish remover. Subsequently, I used a thin sandpaper to remove the bright coat and now the orange paint looks more opaque and unattended: I need to correct some points, especially on the roof, but in the next days I will try to add the "rust effect", so the car will appear like a real clunker car!! Finally, I put the "01" graphic on the doors and then I created the CB antenna for the trunk.
   In the next few days, I will continue to work on this model (especially on the interior), so stay tuned!!

Posted by: Fabiano on Wed 1/14/2009 11:3904


Open the doors!

   Yesterday, I worked on the pre-Cooter General Lee so now it's possible to open the doors (like in the movie). To do this, I removed the original plastic blocks and then I created (with the plasticard) two thickness to maintain the doors aligned. A slight change to obtain a great result!!!

Posted by: Fabiano on Fri 1/16/2009 16:2005


The cage

   Yesterday, using some plastic beams, I created the new full roll cage for my pre-Cooter General Lee (as you can see from the pictures, I used also some parts from the original roll cage designed by ERTL). Now, this cage is unrefined, but during the weekend I will scratch it with a thin sandpaper and then I will paint it with mat black. Have a nice weekend!!

Posted by: Fabiano on Fri 1/23/2009 15:1200


New rims

   In the previous days, I worked on the pre-Cooter General Lee. Finally, I finished to work on the full roll cage: I painted it with the primer and then with a mat black. Moreover, I worked on the final rims painting them with mat black. The next step is to work on the interior (creation of the rear seat and a new color for the seats and the dashboard).

Posted by: Fabiano on Wed 1/28/2009 20:3202


The rear seat

   The day before yesterday, I worked on the pre-Cooter General Lee and I created the rear seat: to do this, I used only the plasticard and when I obtained the right shape, I painted it with the grey primer and then with the usual mat black paint. During the weekend, I will paint the dashboard and the door panels. Have a nice weekend!!!

Posted by: Fabiano on Fri 2/6/2009 16:1402


Interior parts completed!!

   Finally, during the weekend, I finished to paint the dashboard and the doors panels: now, all the interior parts have a mat black color, but to complete my customization I need to add an aged effect to these parts and to the shell.
   Moreover, during the weekend I worked on another famous model, the Nova used on "Death Proof": tomorrow, I will publish new pictures about this car, so stay tuned!!!

Posted by: Fabiano on Mon 2/9/2009 12:11010


This car is Death Proof!!

   As promised, today I will show you all the updates on the Chevy Nova used in "Death Proof": as you can see, I created the full roll cage using a lot of plastic beams. Moreover, I created the internal mechanisms to lock the doors and all the parts have painted with chromed paint and in the future I will add the rust effect. I hope you like this hellish car!!!

Posted by: Fabiano on Wed 2/11/2009 17:0902


'68 Dodge Charger

   Starting from today, this week I will show you 3 (one per day) diecast models I bought some weeks ago from my supplier. This time, these cars are not TV/movie related, but I bought them because I like very much the original car. Today, I would like to show you the red '68 Dodge Charger R/T produced by RC2/ERTL. The model is awesome, the details are very high and the level is indentical to the Authentics General Lee I bought some months ago. In the next few days, I will show you the '69 and the '70 versions.

Posted by: Fabiano on Mon 2/16/2009 17:2603


'69 Dodge Charger

   As announced yesterday, today I will show you the second version of the awesome Authentics Dodge Charger produced by RC2/ERTL: this time it's the turn of the famous '69 model, used to give the soul to the General Lee!!! In this case, the engine is an Hemi and it's very detailed!!! The paint job is very good: a bright black with a white R/T stripe!!! It's a great model, especially for some details, like the rims, the interior and the engine. See you tomorrow with the '70 Dodge Charger model.

Posted by: Fabiano on Tue 2/17/2009 17:5005


'70 Dodge Charger

   Finally, today I will finish to show you the last Dodge Charger I bought, the '70 version. As you can see, this model has an unusual purple metallic paint with a black vinyl roof. Moreover, like the other models, this is a R/T version but this time it has an Hemi engine under the hood. It's an awesome model, especially for the good paint and the very detailed engine, the better mounted on these 3 Chargers.
   If you want a Charger on your diecast collection, don't buy the old models produced by ERTL or Hot Wheels: you need to buy one of these 3 Authentics Dodge Chargers!!! You will not regret this choise!!

Posted by: Fabiano on Thu 2/19/2009 17:3904


A new Batmobile in my garage!

   The last year, in march, I bought the base version of the '66 Batmobile, the car used in the famous TV series. It's a good model, but it's not very detailed. So, during the last weeks, I decided to buy the Elite version, a more detailed model produced by Hot Wheels. On this model, it's possible to open the hood and the trunk, the interior is more correct (chromed parts, correct labels, phone accurate, etc.) and the front grill is pierced with transparent lights.
   If you want to buy a '66 Batmobile, this is the right choice, especially because this model has a good price/quality ratio.

Posted by: Fabiano on Thu 2/26/2009 15:5506


A new railroad for my DeLorean

   Today, I decided to create a base for my DeLorean from "Back to the Future III": this is the car used in the railroad scenes, so using some papers of plasticard and some wood textures, I created a "display" railroad. So, also in my IKEA display case, this model will have a good setting. I hope you like it!!

Posted by: Fabiano on Sat 2/28/2009 17:2109


A Phantasm in the garage

   Waiting to show you the white Porsche 928 and the silver DeLorean DMC-12, today I would like to show you the 1971 Plymouth 'Cuda used in the movie "Phantasm": this model is produced by ERTL and I can say it's a good model, but the detail is not very high, especially on the engine (very poor), on the interior (low detailed) and on the shell (some details are only created with decals, like the lateral air intake).
   So, if you want a model with the original "Phantasm" trademark buy this one... otherwise buy the model produced by Highway '61: it's better on all respects!!

Posted by: Fabiano on Mon 3/9/2009 16:2900


You will be the Frankenstein's Monster!!!

   Today I will not show you a new diecast model, but I will show you the second gift I received during the Christmas holiday from Alessio (the user "testarossa" on this site). As you remember, it's a damaged Shelby Mustang GT500KR and watching the pictures you will notice the restoration is not easy: the paint is compromised, the windshield and the left window are scratched and all the openings are broken (for this reason, there is a red tape on every opening). After a long cogitation, I've decided the restoration is not possibile (and remember, I have yet another perfect Shelby Mustang GT500KR in my collection), so I will convert this Mustang into the Frankenstein's Monster from the "Death Race" movie!!! I will start this customization the next week, so stay tuned!!!

Posted by: Fabiano on Tue 3/10/2009 17:26013


The Mustang is naked!

   Yesterday, I started to dismantle the Shelby Mustang GT500KR and during the next weeks, I will try to convert it into the Frankestein's Monster car (Death Race). As you can see, I removed all the opening parts: the doors, the trunk and the hood. Moreover, I removed also the internal parts and the windows, so now I'm ready to strip all the shell and then I will create and apply new body parts using the plasticard.

Posted by: Fabiano on Thu 3/12/2009 15:3501


The templates for the roof and the front bumper

   During this weekend, I started to create (using the paper) the templates to define the new hood and the new front bumper. When I will finish the templates I will construct these pieces using the plasticard. It's not easy to create a piece from scratch, but I think I will make my best to do it!!

Posted by: Fabiano on Sat 3/21/2009 16:3104


Porsche 928 by AutoArt

   Finally, today I show you the Porsche 928 I bought some weeks ago. In my opinion, this is one of the best 10 cars produced in the history of the automotive: I like very much the style and the lines of this car, especially because it's a typical '80's car. I started to like this car when I was child and I saw for the first time the movie "Riscky Business", with a funny Tom Cruise. Unfortunately, AutoArt has not produced this model with the awesome gold/bronze paint used in the movie, but only in 2 colours, white and sky-blu... At the end, I choose the white version because it's more classic and I think this color increase the class of this diecast.
   If you are a Porsche fan or if you want a great diecast model in your collection, bought it as soon as possible!!!

Posted by: Fabiano on Wed 3/25/2009 16:3203


Death Race Mustang, working in progress

   As promised, today I want to show you the progress on my current job, the Ford Mustang used in the movie "Death Race". As you remember, I received this diecast model as a Xmas gift from Alessio, a user of this site: the model is a ruined Shelby Mustang GT500KR and considering its conditions, I've decided to transform it into a new car and the better solution was the Frankenstein's Monster car. To do this, I started creating some layout with the paper and then I recreated the final shapes on the plasticard. This is the result and I'm very satisfy about the result obtained. During the next week, I will continue to customize this car, especially on the rear part. I hope you like it!

Posted by: Fabiano on Wed 4/29/2009 11:0403


The shield

   During the last weekend, I worked on the Frankenstein's Mustang from the movie "Death Race". I created the 2 lateral air intakes (back to the doors) and the rear spoiler with the big rear shield. Now I need only to create all the components on the quarter panels. Stay tuned for future updates!!

Posted by: Fabiano on Mon 5/4/2009 11:5500


Other updates on the Frankestein's Mustang

   Yesterday, I created a lateral body extension on the left quarter panel. I need to finish it, adding other 2 elements and then polishing it, but I'm satisfied about the result obtained. Within the next fews days, I will create the same pieces on the other side and then I will proceed to create the armours on the screens.

Posted by: Fabiano on Wed 5/6/2009 17:01011


Death Race: the shell is almost finished!

   Finally, today I finished to create the extra elements on the body of the Frankestein's Mustang. To complete the exterior I need only to create the armours on the screens and the machine guns over the hood, then I will paint all the body with a dark grey, adding also a ruined effect. Have a nice weekend!

Posted by: Fabiano on Sat 5/9/2009 15:1906


The "real" DeLorean DMC-12

   Many people are accustomed to see this car only decorated with tubes, wires and bright plates, but today I would like to show you the "real" DeLorean DMC-12. This model is produced by SunStar and it's a must for every "Back to the Future" fan! In this case, on the rear there isn't the atomic engine created by Doc, but there is the reproduction of the real "PRV V6" created by Peugeot, Renault, e Volvo. Another great difference is on the front of the car, because in this case the front wheels are steerable (in the BTTF releases the front wheels are fixed).
   So, if you want to complete your "Back to the Future" collection, I advice you to buy this diecast model: the price is very cheaper and the quality is very good!!

Posted by: Fabiano on Tue 5/12/2009 18:4505


The first shield

   Only limited progress during these days... I created the shield for the back window: this part is composed of two main parts (one overlapped to the other) and 8 little strips arranged adjacent to each other. Finally, the shield has been superimposed and fixed to the back window with double-sided tape.
   In the coming days I hope to be able to terminate the shields on all other glass surfaces.

Posted by: Fabiano on Tue 5/19/2009 14:5905


The shields on the windows

   After some days of work, I've finished the protective shields for all the windows. Now I need to finish each piece with sandpaper and then the body will be ready to be treated with the primer. Meanwhile, I'm trying to think how to create the machine gun and how to customize the interior. But now enjoy the pictures!

Posted by: Fabiano on Tue 5/26/2009 11:4403


Two simple updates on my Lee1

   The other day I won on eBay a beautiful object about the Lee1, the first General Lee ever built. Waiting for that object arrives at my house, I decided to fix two flaws that my Lee1 has always had: the push bar and the antenna close to the hood. So, I created a new push bar with the plasticard (now with the proper point of attack on the body) and then I scaled the base of the antenna, now more precise and less coarse.

Posted by: Fabiano on Wed 5/27/2009 10:4500


Another Bullit's Mustang

   Yesterday I received one of my last purchases, the awesome '68 Ford Mustang GT390 produced by AutoArt. This is the car used by Steve McQueen in the movie "Bullit" and it's famous for its amazing chasing chase through San Francisco.
   There was already in my collection a Bullit's Mustang produced by ERTL, but the model of AUTOart is much better: I need only to add the famous license plate JJZ 109 and then it will be perfect! In the next days will make a comparative test with the ERTL Mustang.

Posted by: Fabiano on Sun 5/31/2009 12:2100


Lee1 found diorama

   On October 11, 2000, Gary Schneider and Travis Bell met Don Shishler in Cummings, GA. Don had some fascinating stories to tell: he told to Gary and Travis the story that a man named Cliff hauled away all the cars that were used in the Dukes episodes when they had completed filming. Don hadn't talked to Cliff in years, but volunteered to call him anyway: Cliff wasn't at home, but his wife told Don that most of those cars had long since been crushed, but she did say that there was an old Charger out there that wasn't orange, but that it did have a 71 on the door. During the first 5 episodes of "The Dukes of Hazzard" series, the Lee1 was repainted in blue and the 71 numbers were painted on the doors. Gary and Travis had discovered what remained of the first General Lee ever built, the LEE1...
   During the past few weeks, Paul Dengel (zed4130) wrote me that an english guy was selling on eBay a diorama of how the Lee1 was found by Gary Schneider and Travis Bell. Needless to say that at the end I won the auction and now this beautiful model is in my collection! I take this opportunity to thank Paul and David (the guy who created this diorama).

Posted by: Fabiano on Mon 6/8/2009 12:3705


Death Race Mustang, body works finished

   During the previous days, I finished to work on the nose of the Ford Mustang used in the movie "Death Race". Now nothing more that give it a beautiful coating of primer and then find the right color to paint it...

Posted by: Fabiano on Mon 6/22/2009 14:1703


From Tokyo to Italy on a Chevy

   I bought this model towards the end of April, but due to some commitments, I show it only today: that's the '70 Chevy Monte Carlo used in the movie "Tokyo Drift". I haven't particularly appreciated the third movie of the saga "Fast & Furious", but this muscle car is very attractive (especially with this rough color), and so it couldn't miss in my collection.
   It's a beautiful model with a good quality/price ratio: the only great flaw is in the steering wheel, chromed and very similar to those mounted on the toy car...

Posted by: Fabiano on Wed 6/24/2009 12:0406


The Mustang with the primer

   After one week, I finally found the time to give the primer on the body and all the elements I have added to the Mustang of the movie "Death Race". Now I need only to find a good mat black, adding also a rough effect to the car. It will not be easy!

Posted by: Fabiano on Mon 6/29/2009 16:2404


One of the next projects

   A few days ago I received this '70 Dodge Charger Street Machine version. As you can already guess, this model will not remain so much longer: in its destiny, in fact, it's already marked to become the Vin Diesel's car from the fourth movie of the saga "Fast & Furious."
   Some parts will be reconstructed (for example, the front nose and the inside cage), while other parts will be transplanted to other models (such the rubbers that will be used to create a General Lee movie version).

Posted by: Fabiano on Tue 6/30/2009 19:3200


Finally I found it!

   After several researches I've finally found a very rare piece, something that lay for a lot of time in my "wish list". This is the Nissan Skyline GT-R 1999 used by Paul Walker in the movie "2 Fast 2 Furious": there are certainly better replicas of this car (for example AUTOart) but this model is certainly appreciate for its rarity. In this way, with the '69 Chevy Camaro and the '70 Dodge Challenger, I finished the cars I'm interested about the movie "2 Fast 2 Furious".

Posted by: Fabiano on Mon 7/6/2009 17:3504


Ferrari F40

   After several days of silence, I'm here today to show you one of my recent purchases, the amazing Ferrari F40 "Light Weight" produced by Kyosho. I bought this model to replace the model produced by Burago which has a level of detail very low. However, this Kyosho is very detailed and the quality/price ratio is very excellent, unlike some Ferrari's produced by Hot Wheels...
   So, if you are looking for a good reproduction of this beautiful cars of the 80s, do not wait and bring home this model: to be true, it lacks only the noise of the engine!

Posted by: Fabiano on Fri 7/17/2009 16:4603


Scarface

   A new arrival in my scaled garage... Today, in fact, I would like to show you the beautiful 1963 Cadillac 62 series used by the great Al Pacino in the movie "Scarface". The model is produced by JADATOYS and in the box it's included even a small action figure of Al Pacino (but I haven't included it in the photos). I must admit that this model is really nice done (the interior is very well maintained and the outside is clear and well-finished): the only flaw that I find is that the front wheels are not steered (it is a feature of many models of JADATOYS).
   I take this opportunity to thank Alessio "Sonny" for having pointed out this beautiful model at a very low price.

Posted by: Fabiano on Fri 7/24/2009 11:4802


Ferrari Testarossa (Miami Vice) by Hot Wheels [Review]

   As announced in my last post, few days ago I received the new Ferrari Testarossa produced by Hot Wheels: it's a limited series (mine is number 1723) and it's a model of the series "Star Cars". In fact, without the official license, this is the Testarossa used by Sonny Crockett from the third season of the TV series "Miami Vice". The model is based on the old BBurago with some improvements (good paint, engine quite accurate, wheels more proportionate) but could do it better (interior not sufficient detailed, side grilles applied to the body, headlamps fixed).
   I would have preferred it had been the Kyosho to produce the replica of the Testarossa used in "Miami Vice" but for now I'll settle for this. I hope that sooner or later something changes, so we could see a white Testarossa produced by Kyosho!

Posted by: Fabiano on Tue 8/25/2009 13:2607


Half General Lee, half #71

   As promised, today I will show you the pictures about the last item entered in my collection, a beautiful 1969 Dodge Charger, half "General Lee" and half "#71". This model always comes from UK and was created by David, the same boy who created the other #71 in my collection.
   In the coming days, I will offer you funny pictures, playing on the double face of this model.

Posted by: Fabiano on Tue 10/13/2009 10:2003


One comes, one goes!

   For the first time, one of the diecast model of my collection was sold, but only to make space for another. Being out the official version of the Plymouth Road Runner used by Daisy Duke, I thought to buy it, but selling the Plymouth Road Runner black limited edition that I bought in January 2008. Below you can see the pictures I took alongside the two models, prior to the shipment of what I sold. I was a little sorry, because it was with me for several years, but in the end (for space reasons) I had to make space for the new arrival and having the official one I wouldn't definitely converted it.
   Soon, when the weather conditions will allow me to take pictures outdoor, I will show you in detail the new purchase. Enjoy the pictures!

Posted by: Fabiano on Fri 1/16/2015 11:5702


Ford Mustang: we put together the pieces!

   Some weeks ago I came into possession of this Ford Mustang 1968 "Bullit". The special feature of this model was that the hood was completely broken into several pieces (exactly 6 pieces). Having already two Ford Mustang "Bullitt" (one produced by ERTL and the other produced by AutoArt) I thought it would be useless to fix it to restore its original appearance, but it would be better to fix it and modify it to create a new model that is not in my collection. After several days of searching, I had the right idea: this will become the Mustang Ford Mustang "Lucifer" used in the episode 7 of the first season of the TV series "The Dukes of Hazzard". To do this I adjusted the hood with the two-component epoxy adhesive for metals and with sandpaper I leveled all the differences that had formed, creating a smooth surface. In the next days I will completely remove paint in the rest of the body and I will create the large air intake at the center of the hood. Stay tuned because I will post many updates about this model and many others news!

Posted by: Fabiano on Mon 1/19/2015 11:4202


Ford Mustang Lucifer: Episode 2

   As I told you yesterday, today I show you the progress I'm making on the 1968 Ford Mustang "Lucifer" . Work continues, a little slow, perhaps because I'm a bit rusty, but there is also to say that dismantling and removing paint this Mustang was more complicated than expected. The paint was very strong and I had to give 3 coats of gel paint stripper and many details (lights, bumper, mirror, etc.) were firmly glued to the body. I therefore had to be very careful to avoid breaking them! Monday I will start to define with plasticard the side grips and the center tap of the bonnet, then, I will still a fine sandpaper and then you will go to the paint in matte black. See you next week!

Posted by: Fabiano on Fri 2/6/2015 15:0202


Ford Mustang Lucifer: Episode 3

   Last night I was able to work a little bit on the 1968 Ford Mustang "Lucifer": I started working on the side air intakes as those series were not going well, because they were not like those mounted on the car used in "The Dukes of Hazzard." I used to carry them out of the plastic sheets, duly cut and shaped, then I have applied to the body. Today, after waiting a whole day for the glue to dry, I shall pass the sandpaper to remove any glue residue and to smooth the edges of the air intakes. Then, if I find the inspiration, I will start to create the air intake to attach the hood. Good view of the photos!

Posted by: Fabiano on Wed 2/11/2015 15:5900


Ford Mustang Lucifer: Episode 4

   In recent days I worked on the Mustang Lucifer: I made with plastic sheets the hump to be placed on the hood and after it is shaped and sanded, I proceeded to stick permanently to the hood. At that point, I was ready to go to the paint, so I gave it two coats of flat black paint to the body, to the front, the bonnet and the two doors. Today also will paint the trunk and the back that I could not paint in recent days because I had to wait for the new wing plastic is attacked well to metal parts. I then did a quick test assembly with the chassis, but I have yet to replace the wheels with new ones that I did arrive from Spain.
   See you Monday with more news: for now have a nice weekend and enjoy the pics!

   Tomorrow, February 14, I will go to visit the exhibition of cars and motorcycles at the "Automotoretrò" in Turin. If any of you will go there, it will be a good opportunity to meet and know each other, perhaps to see up close some of our favorite replica used in movies or TV series. However, next week I will publish a lot of pics from this event!
Posted by: Fabiano on Fri 2/13/2015 13:5102


Ford Mustang Lucifer: Episode 5

   Finally I managed to "close" the Mustang Lucifer! Inside the car I placed a chrome roll bar and I replaced the original wheels with those of the Shelby GT 500 that I bought from Spain. I know, are not perfectly identical to those mounted on the real machine, but they are the ones that are closest. Also, I put all the details outside the body (mirror, windshield wipers, door handles, chrome, etc.), and I added the original plate "CK 8229". Now, when I have the inspiration, will paint flames on the front of the body and then I will apply a sticker on the doors round with the number "13". To see this, however, you'll have to wait a few more days, I must first find the right color and, as I said, the inspiration ... and courage! Enjoy the photos now!

   If any of you want to start collecting cars or is looking for some rare pieces related to the TV series "The Dukes of Hazzard", can try to buy this beautiful lot that I found on the site "Subito.it". Unfortunately, the models are not sold separately but only in batch. If you still want to give him an eye, click on the images below to view the announcement.
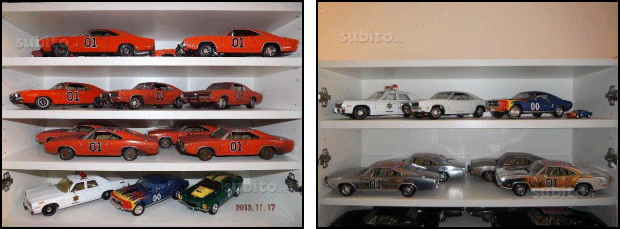
Posted by: Fabiano on Tue 2/17/2015 11:0800


Charger "Cale Yarborough" - Episode 1

   Waiting to find the right inspiration to complete the flames on the Mustang "Lucifer", I started working on the 1968 white Dodge Charger that will replicate the car used by Cale Yarborough in the episode 7 of the second season of "The Dukes of Hazzard." It was so that I wanted to achieve it, but I never found the time ... Now it was time to add it to my collection! Of course I used as a base another General Lee: I proceeded to dismantle it completely and with the usual gel paint stripper, I completely removed the orange paint and after giving even a very light sandpaper, I proceeded to paint all with two hands white paint. The result is really great: bright color and no imperfection. In the next days I will continue painting the interior with mat black, then I will focus on the engine, which is the important part of this model. Enjoy the photos!

Posted by: Fabiano on Thu 2/26/2015 20:5900


Charger "Cale Yarborough" - Episode 2

   Yesterday I was able to move forward in the work with the Dodge Charger of Cale Yarborough. I took care of the interior, which were painted matt black. I have yet to create the little grey box to drive the compressor from the dashboard, but everything else is complete. The next step will take care of the engine (which must be fully detailed) and engine compartment (which will be painted black like the rest of the chassis). I also realized the license plates that I will apply in the next days. For now enjoy some pictures of the outside with the car fully assembled. Enjoy the show!

Posted by: Fabiano on Tue 3/3/2015 10:3502


Charger "Cale Yarborough" - Episode 3

   Work on the Cale Yarborough`s Dodge Charger proceed. Yesterday I proceeded to remove the engine from the body, painting both the motor and the engine compartment with a matte black paint. I then proceeded to reassemble everything: now I just have to find the right elements to add to the top of the engine to simulate the compressor mounted on the real car. We are almost in the finishing straight! Enjoy the show!

Posted by: Fabiano on Fri 3/6/2015 16:4503


Autotrader Police Car - Episode 1

   A few weeks ago I talked about my next project: after seeing the advertisement of Autotrader with Duke cousins I had come up with the idea for the orange SRT Viper and the 2006 Dodge Charger used by the Police of Hazzard County. These days, waiting to find the right pieces to complete the turbo engine of the Dodge Charger used by Cale Yarborough, I started working on what will become the car of the Police. The transformation is quite simple: the car will be completely dismantled, stripped and painted brilliant white. Then I will prepare the decals for the doors, I will apply a flashing light (ordered from the US) on the roof and on the muzzle a bullbar recovered from a modified General Lee. Lastly rims will be painted black. Inside, however, there will carry out any changes. We read again in the next few days for some other news about it!

Posted by: Fabiano on Mon 3/9/2015 15:0400


Autotrader Police Car - Episode 2

   I must admit that in recent times I use more time removing paint from a model than to modify and paint it. As I wrote on the forum, in fact, I'm making it increasingly difficult to remove the original paint from the models: in particular, on this 2006 Dodge Charger remove the paint was a really difficult feat: it did not want to come off! In addition to rest, after removing the paint and having plastered the spoilers holes that were removed, I applied the bright white paint, but I had the bad idea to use a paint of a different brand than usual. Result: it did not adhere to the body as it should and it's casting all sides. For this reason I had to remove paint from the car a second time! In the pictures, you will see the model without paint and the last preparation for painting with primer, as well as to the two bumpers that are coming very well. Tonight, I'm going to buy back the usual paint Saratoga, then I will definitely paint the model and tomorrow I will start to reassembly the entire car. Cross your fingers !!

Posted by: Fabiano on Mon 3/16/2015 15:0400


Autotrader Police Car - Episode 3

   I did it! Finally, with the right paint, the 2006 Dodge Charger has been painted properly! The final yield of brilliant white is fabulous (it's the same color used for the Cale Yarborough's Dodge Charger) and this evening I will start with the reassembly of the model, but first I have to finish to complete the painting of some internal details. At that point, I will be able to apply the flashing light on the roof, the bullbar on the front and the decals on the sides. I can not wait to finish it ... it lasted too long! See you tomorrow!

Posted by: Fabiano on Tue 3/17/2015 12:1700


Autotrader Police Car - Episode 4

   Sorry for the delay, but these days I have been quite busy with my job! However I continued to work on the 2006 Dodge Charger 2006: I painted black profiles on the doors, I stuccoed and painted black the inside of the roof and the bullbar and I finally reassembled the car just to see how it was coming temporarily . Monday I'll post some more updates, since the weekend I'll work on it! Have a nice weekend!

Posted by: Fabiano on Sat 3/21/2015 15:5500


Autotrader Police Car - Episode 5

   During the weekend I was able to add some details to the Police Dodge Charger. As I told you a few weeks ago, I recycled a bullbar advanced by a General Lee and with minor changes I managed to catch it in the air intakes in the front bumper. In addition, I added the lightbar on the roof and I prepared decals related to the Hazzard County Sheriff. Tomorrow I will print them with my job's printer and then I will apply them to the car so I could consider it finished! See you soon with more news!

Posted by: Fabiano on Mon 3/23/2015 20:3000


Autotrader Police Car - Episode 6

   Finally I can say that I have completed the Dodge Charger used as Police cars in the Autotrader TV spot! After preparing the decals with my PC, I printed them on adhesive paper and I applied to the sides of the model. Of course I also prepared the two plates that you can see during the TV spot: at the end I chose the one that looks best (KPI59Y3) as you can also see in the picture above. Finally, I painted matt black the side mirrors, I reapplied the mirror decals and glued them to the lateral front doors. Now I can finally put it in the display cabinet to start the orange Viper used by the Duke cousins to replace the General Lee.

Posted by: Fabiano on Thu 3/26/2015 11:3405


Italian Job - Blue Mini - Episode 1

   Yesterday I started to work on the first of three Minis used in the original movie "Italian Job". To do that I bought an Aston Mini Cooper produced by Solido: the original color was green but it will be painted with a light blue. As you can see from the pics below, I started to take it apart and I covered all the body with the paint stripper. During the weekend I will finish the body with the sandpaper and then I will repaint it with the right color. Stay tuned!

Posted by: Fabiano on Fri 4/10/2015 15:1300


Italian Job - Blue Mini - Episode 2

   As anticipated last week, Sunday I worked on the blue Mini. After removing the last remnants of paint, I proceeded to give two coats of blue paint. From the photos the color looks lighter than it really is: once completed I will try to make better pictures in optimal conditions, so as to do justice to this colour. This evening I should start to assemble it again: in the next few days I will publish more pictures, stay tuned!

Posted by: Fabiano on Mon 4/13/2015 16:1600


Street Hawk - Vintage Toys

   In these two days, I made two purchases a little bit strange... They are not detailed diecast models, but vintage toys built during the 80s. At the beginning of April, in fact, I shown you an amazing handmade model created by an English boy about the bike used in "Street Hawk". Well, after this, I decided to create a new model of this bike but starting from a base that already exists, that is, the model produced by LJN in 1984. My idea is to use the existing part of the body (caulking parts to correct defects of plastic) but using also the frame and the wheels from an Honda XR 400r produced by Maisto. It will not be an easy job, but I still want to try to create something as similar as possible to the original bike. Why I bought two? The one without the package, as I have explained above, will be modified, plasted and repainted. That one contained in the package will left as is, it will be exposed unchanged: considering the "MIB" state of conservation, after all these years, would be a shame modify it!

Posted by: Fabiano on Mon 4/20/2015 16:0902


Italian Job - Blue Mini - Episode 3

   Although a few days late, I started to reassemble the blue Mini. Very little is missing to complete it: I have to prepare the license plates, creating the black belts to be applied on the hood (I think to realize them with black electrical tape) and find additional headlights to be applied on the front. I tried searching on the eBay but I found very little and only for smaller scale models ... I hope to find as soon as possible a solution because I would like to complete this Mini (and also the other two!).

Posted by: Fabiano on Wed 4/22/2015 16:1306


Italian Job - White Mini - Episode 1

   While waiting to receive the correct straps and additional fog lamps for the blue Mini (but also for the other two Minis) I started working on another Mini to make it the white Mini. I must admit that working on these models is very pleasant: come apart easily, the paint comes off with impressive speed and both the painting that the reassembling guarantee excellent results in a short time. Today I show you the work of dismantling and stripping the body, and tomorrow I will show you photos of the Mini repainted. So... stay on these pages because getting it!

Posted by: Fabiano on Mon 4/27/2015 12:4500


Italian Job - White Mini - Episode 2

   The second Mini has finally been painted: here are some pictures during the painting process and during the assembly process of the entire model. As you noticed were also already applied the correct license plate (in the case of the white Mini is "GPF 146G"). Tomorrow will come instead photos of the red Mini, where the paint job was much faster, since I had to do only the roof. Then, in the next few days I will show you the work on the 3 Minis to apply the black straps on the hoods and the front additional headlights.

Posted by: Fabiano on Tue 4/28/2015 16:5800


Italian Job - White Mini - Episode 3

   Small updates today for the white Mini: I added straps on the hood with electrical tape (waiting to receive the correct ones from Tremonia) and I did the same thing on the blue Mini. I took the opportunity then to organize a little meeting between the white and the blue Mini, waiting for other changes relative to the headlights. While I was there I also approached the red Mini that will end soon in the paint shop!

Posted by: Fabiano on Wed 4/29/2015 14:5308


Italian Job - Red Mini - Episode 1

   Yesterday I painted the roof of the third Mini, the red one. The body of this car was already red, so I only removed the roof and painted it with the right shade of red. Since in this case the work was very limited, I started to create the brackets to support the additional headlights. Initially I tried to do it by hand, but since the result does not satisfy me, I created a template with a plank of wood, nails and a drawing made on paper. In this way I managed to create with the wire three brackets perfectly identical. I then applied them to the 3 Mini to see if the proportions were loyal and I'm really satisfied with the result. In the coming days, as soon as I receive the additional headlights from France, I will paint them with the chrome paint, I will apply them on the brackets and then I will add the protective nets in front of each headlight. As usual, I took the opportunity to take some pictures of the group of 3 Mini. Enjoy with them!

Posted by: Fabiano on Thu 4/30/2015 11:4402


Autotrader Viper - Episode 1

   While waiting to be able to continue work on the 3 Mini of "The Italian Job" (I'm waiting for the straps and additional headlights) did not want to stay with my arms folded, so I started working on a new project that I presented you almost 2 months ago. It's the Viper used by Bo and Luke in the "Autotrader" TV spot. As you will recall, a few months ago I created the replica of the police cars of that spot but I had always put off work on this Viper. During this weekend also came his moment of falling under the "tools". As you can see from the pictures, the model has been completely dismantled, stripped and was applied three coats of paint in pastel orange RAL 2003. These days I will paint the black profiles on the doors and vents, then I give a final coat of clear gloss to add sparkle to the whole body. Stay tuned because in the next days the Viper, the 2006 Police Dodge Charger and the General Lee will meet together again, just like in the TV spot!

Posted by: Fabiano on Mon 5/4/2015 12:1500


Autotrader Viper - Episode 2

   Last week has been quite hectic and I could not work on the SRT Viper as I wanted. However, over the weekend I recovered time and I started to reassemble it. As you can see from the last time, I made black profiles along the side windows and spent two coats of clear coat on the orange paint: now the Viper is very shiny! Tomorrow I'll post pictures of the model completed with the doors, the dashboard, the windshield and the rear lights. Then the final touch: I will apply the license plate CNH320 and the number "01" that I made on the PC starting directly from the pic of the real Viper used in the TV spot. See you tomorrow!

Posted by: Fabiano on Mon 5/11/2015 11:3900


Taxxi - Episode 1

   In this period I am working on some different cars: as soon as possible I will add additional headlights on the 3 Minis used in "The Italian Job" and then I will apply the "01" decals and the license plate on the SRT Viper used in the Autotrader TV Spot. However, yesterday I received the Peugeot 605 that I will use as a base to carry out the Peugeot used in the movie "Taxxi". The model was kept in the original box, but the paint (probably low quality) must be degraded over time becoming a little sticky and therefore part of the polystyrene has stuck to it. Not bad ... just go completely stripped (I have tested on the bumpers and comes off like butter!). For now I leave you with images of models and the first phase of dismantling. In the coming days I will show you the stages of stripping.

Posted by: Fabiano on Wed 6/17/2015 11:5000


Taxxi - Episode 2

   The Peugeot was completely stripped: it was a really easy job. As I wrote in my previous post, the paint came off easily and it took a simple sanded to remove any residue. I also glued and clean the interior and now they look much more attractive! Before proceeding with the painting, I'll create with plasticard the extension of the front bumper and the rear spoiler to be placed on the trunk. It will surely be the most fun and most important stage of this WIP. Probably I will work on it this Sunday, so next week I will start the car paint! Have a nice weekend!

Posted by: Fabiano on Fri 6/19/2015 11:0200


Taxxi - Episode 3

   During the weekend, due to some unexpected sudden, I managed only to create the rear spoiler to be placed on top of the trunk. Of course I started with this element because it was definitely the easiest to accomplish. In the next days, I will go on creating even the spoiler for the front bumper. Meanwhile I ordered also a 3mm reinforcing bar to be used as axes for the new wheels: in this way I can also easily lower the trim of the car, since the current hubs are too high. See you next time!

Posted by: Fabiano on Mon 6/22/2015 16:3202


Taxxi - Episode 4

   After the policy interlude written yesterday (which I hope bursts like a soap bubble) I went back to work on the Peugeot used in Taxxi. I started to create the front spoiler with plasticard and I put the foundation to create the side flaps. Just to see how it was coming, I tried to place the correct wheels on the model and I must say I am very happy about the result. When the spoiler will be completed and when the car body will be completely painted white, the final result should certainly be of great impact. See you soon with more updates!

Posted by: Fabiano on Thu 6/25/2015 12:0308


Taxxi - Episode 5

   Perhaps in this period I am quite inspired, so last evening I worked again on the front bumper of the Peugeot to create the side flaps. I must admit that it took a lot of attention to precisely align the fins, but after one pass of sandpaper, the result satisfies me a lot. Over the weekend I'll work again on this car to try to achieve, always with the plastic card, the taxi sign to be placed on the roof. Once completed also this element, I can finally give a coat of primer and then paint the entire body of a beautiful shiny white!

   There is also a curious aspect: searching information and photos of the real machine, I saw that on June 21 the Ottomobile announced the production of a "Taxxi" Peugeot 406 in 1:18 scale made of resin. It has not yet been notified of a possible date of production and sale. I will keep you updated!

Posted by: Fabiano on Fri 6/26/2015 10:4600


Taxxi - Episode 6

   During the weekend I almost finished the changes to the Peugeot used in Taxxi. First of all, I created a sign to be placed at the center of the roof using 3 layers of plasticard (1mm): the lower part will be painted silver, while the upper part of white and then I will apply the stickers "TAXI MARSEILLE". I also worked on the chassis, always recreating with plasticard attacks to put the new axes brass. All these parts were then painted matte black to fully integrate the new attacks. I also created 4 plastic discs (which I painted black) to be applied back to every wheel to better hide the axes through the spokes of the wheels. I also did a test reassembling the plastic bumper: I would say that now I need only to paint it!

Posted by: Fabiano on Mon 6/29/2015 13:2106


Taxxi - Episode 7

   Small updates on the Peugout used in Taxxi. During the previous days I only managed to apply the primer (with a subsequent pass of fine sandpaper) to the entire body, including new aerodynamic parts. Now I just have to find time to paint definitely the car with the shiny white paint. In the coming days will come more updates: see you next time!

Posted by: Fabiano on Wed 7/1/2015 16:5706


Taxxi - Episode 8

   Finally the Peugout used in Taxxi reached the paint shop! The result pleases me very much, I must say that after spending two coats of white and one transparent, the final effect is very pleasant! I proceeded to paint black also pillars of the doors and the air intake located at the center of the front bumper. I proceeded to paint black even the windows, but in this case I reserve to do some correction because the result does not satisfy me very much. However, step by step, we are almost in the finishing straight ... in a few days the Peugeout will be ready and will finally earn a place in my cabinet!

Posted by: Fabiano on Mon 7/6/2015 16:1300


Taxxi - Episode 9

   Ok, we are almost to the finishing line! I reassembled the Peugeot used in Taxxi but there are still some details to consider it complete. First, I have to do the black protective bars on the side, I have to apply the headlights and fog lamps, and I paint and apply the sign on the roof of the car. As you can see I have already applied the plates used in the first film, and in the next days I will create the Peugeot logos also be applied on the front and back of the car. As I said in my previous message, I was not happy with the way they had come the windows painted gloss black: I have then gone with fine sandpaper to remove all the paint applied, after which I applied a black adhesive film with the wrapping technique. The final effect is definitely better! See you soon with more updates!

Posted by: Fabiano on Wed 7/8/2015 12:1406


Taxxi - Episode 10

   Penultimate update on the Peugeot "Taxxi": I just have to apply the Peugeot logos on the hood and trunk, then I can feel concluded this model. In these pictures you can see the black stripes applied as protective side and the sign Taxi applied over the roof. For three weeks, this will be my last post: finally I leave for the holidays! We read again in late August with many news! Happy holidays!

Posted by: Fabiano on Fri 8/7/2015 11:3100


The Cadillac used in "Back to the Future"

   As I told you a few weeks ago, has finally arrived from the US the Cadillac produced by Fifty and used in the movie "Back to the Future" during the sequence when Doc tells Marty how will he get it back in the future using the energy of lightning that will hit the clock tower at 10:04 PM. The model is in perfect 1:18 scale and it's in perfect shape (except some little signs of oxidation on the iron bumpers) has the clutch motor fully functional. I took the opportunity also to tile the Ford Super Deluxe Convertible used by Biff in 1955. Now enjoy the pictures because in Italy these models can be counted on the fingers of one hand!

Posted by: Fabiano on Sat 11/21/2015 19:1800


DeLorean DMC-12 by AutoArt

   I've told you in early November and in recent days it has finally arrived in my collection: I'm talking about the wonderful DeLorean DMC-12 produced by AutoArt. Needless to say that the model is fabulous, with a very extreme quality. Each element of this model is very detailed and the brushing on the body is impeccable, for this reason in the box there are also marked AutoArt gloves to handle the car without ruining the beautiful effect of the aluminum body. The model can be fully opened, both in the gull-wing doors, either in the front trunk and the engine cover in the back. Each opening is also equipped with small pneumatic shock absorbers that allow to keep raised the openings without the risk that fall on themselves. Of course, the cost of a similar model is very high, but the quality with which it is made will pay off every penny spent.
   As my tradition, next week, I will publish a comparison with the DeLorean DMC-12 produced by SunStar: have just a little patience and you will enjoy advantages and disadvantages of each model!

Posted by: Fabiano on Thu 11/26/2015 14:4300


Lamborghini Countach LP5000S (red) by Kyosho

   I must admit that throughout 2015 and during the beginning of 2016 I purchased a lot of diecast models, but I have not presented them properly to this site. Starting from today, I will try to recover the time lost presenting periodically the new models become part of my collection. Today is the turn of the red Lamborghini Countach LP5000S, acquired to replicate the Countach used in the movie "The Cannonball Run 2". The model is manufactured by Kyosho and as you can see the detail level is very high (I have also a Countach produced by BBurago and it is useless to deny that they are on two completely different planets: maybe I'll decide later to make a comparison, but it is a lost battle). It must be said that I have always loved the Countach and I consider it one of the most beautiful cars of all time, so it deserved to be "replicated" faithfully in my collection. Now enjoy the pictures and in a few days I will introduce also the black Countach LP500, taken to replicate the Countach used in the movie "The Cannonball Run". Have a nice weekend!

Posted by: Fabiano on Fri 1/22/2016 12:2000


Lamborghini Countach LP5000S (black) by Kyosho

   Last friday I showed you the red Lamborghini Countach LP5000S produced by Kyosho. Today is the turn of the black version. There is nothing to add to what I said last week: the model has a very high level of detail both inside and out. We can immediately notice even the correct proportions of the car, especially the alloy wheels, which in other models on the market (for example BBurago) are completely oversized. Amazing elements on this model are the moving parts: from the doors to the trunks, until you get to the retractable lights, design feature much loved and used on sports cars of the 70s and 80s. In the following images you can see the black Countach photographed in the same sequence/angles of the red Countach. But now no more talk, enjoy with the pics!

Posted by: Fabiano on Thu 1/28/2016 16:2400


Ferrari 365 GT4 "The Junkman"

   Some days ago I have shown you the DVD about "The Junkman" together with the Ferrari 365 GT4 which appears in the opening credits and in some scenes of the film. Today the time has come to show you in detail this Ferrari! It was produced by Kyosho and as usual just watching the images is useful to see the high level of detail of this model. The interior and the body are made really well, perhaps the only flaw is the engine that in my opinion could be more detailed. However is really a very good reproduction of the actual car, along with other Ferrari of the 70s and 80s, it goes to fill a "big" hole in my collection: certainly the reference with "The Junkman" it is pulled by the hair, but a Ferrari of such beauty was bound to be mine! In addition, at this time I'm going crazy for models with retractable headlights ... it's true, I'm vintage, in every sense!

Posted by: Fabiano on Wed 2/10/2016 16:5800


"Black Beauty" by AutoArt

   I bought this beautiful "Black Beauty" (a 1965 Chrysler Imperial Crown) produced by AutoArt in the half of last year, but like many other diecast models I haven't still shown it. Slowly I'm making up for lost time, so now it's its turn! The model reproduced by AutoArt represents the "Black Beauty" of the 60s TV series "Green Hornet", including actor Bruce Lee also appeared in the role of Kato, the chauffeur and aide of Green Hornet. The model is really fabulous, has a considerable weight and has many openings (4 doors and the hood). However, in my view, it has some flaws: the trunk can not be opened and the flaps that show the different weapons available to the Green Hornet, can not be closed, as is the case on some James Bond diecast models. For goodness, the model is truly amazing and should be added to your collections, but for about 230 Euros, I expected a little more detail. Now, enjoy the gallery!

Posted by: Fabiano on Tue 2/16/2016 10:1500


2001 Ford Mustang "Bullitt" by AutoArt

   A few weeks ago I announced to you that, taken from the "Bullitt" mania, I decided to buy the two Mustang in configuration "Bullitt" released in 2001 and 2008. Today I show you the 2001 version! This diecast model is produced by AutoArt and perfectly reproduces the model put on the market in 2001 to celebrate Steve McQueen and one of the films that made him famous during the late 60s. As the original Mustang used in the movie, this version has a dark green paint and mount the classic 5-spoke wheels. The detail, as every AutoArt model, is really high, maybe just in the engine and in the interior they could do something more. In the coming days I will introduce you the 2008 version, then I'll show along with the legendary Mustang of 1968! Now enjoy the pictures!

Posted by: Fabiano on Thu 2/25/2016 16:4600


"Two Lane Black Top": 1955 Chevy One-Fifty

   The other day I was talking about the last purchase I made, thanks to suggestion of Giuseppe of "Die-Cast TV & Movie", the 1970 Pontiac GTO used in the movie "Two Lane Black Top". With this purchase I will go to complete the pair of cars used in this movie, becaue in April of the last year I bought the grey 1955 Chevy used by the main character of the film. Unfortunately I never got to show it, but considering the imminent arrival, it seemed the right time! Enjoy the pictures, later I will definitely shot some photos along with its antagonist!

Posted by: Fabiano on Thu 3/10/2016 12:0800


Ferrari F430 "Miami Vice" - Work In Progress Part I

   I bought this Ferrari F430 diecast model in June 2007 to make a replica of the Ferrari used in the film "Miami Vice". I had promised myself to change the interiors to make them blacks, but it's been almost 9 years... Crazy! Last night, I decided to take it apart and do what I have always deferred, that is paint matt black the interior. Surely I will add a black carpet to give more detail to the model, but I have to wait that everything dry for the better. Wait a few more days and I will update you with the latest updates... I promised, this time I will not wait so many years!

Posted by: Fabiano on Thu 3/17/2016 12:1300


Ferrari F430 "Miami Vice" - Work In Progress Part II

   Another day, some small steps towards completing the changes to modify and improve this Ferrari F430 that has long waited to finish under the knife! Yesterday I applied the door panels (also matte black colored) and I packed all four wheels to paint red brake calipers. The final result, with this change, has improved a lot! As a last change, I painted black the two rollbars positioned behind the seats. Over the weekend I will try to add details inside, then finally I will screw the chassis to the body. See you next week and have a nice weekend!

Posted by: Fabiano on Fri 3/18/2016 15:5600


Peugeot 406 "Taxxi" by Ottomobile

   Maybe not everyone knows it, but I would say it is almost impossible ... this white Peugeot 406, driven by reckless Daniel Morales, is the fastest taxi across Marseille and also the co-star of the fun saga "Taxxi", a series of French films written by Luc Besson which was very successful a few years ago in Europe, but also in the US, with an american remake but has not had the same fortune and fame of the original movie. Today I propose you a scaled-down version of this fast taxi, produced by Ottomobile. In this case we are not dealing with a metal model, but with a resin model, devoid of any type of opening but still very detailed. I was able to buy it directly from the manufacturer, so I got it at a price much lower than the prices currently proposed on the various sales sites. It's entered in my collection some months ago, when I was finishing the custom version of the "Taxxi" based on the Peugeot 605 produced by Solido. Sooner or later, I will propose a "comparison" between these two models, just for fun, knowing that the Ottomobile will win! Enjoy it and have fun with the following pictures!

Posted by: Fabiano on Mon 3/21/2016 15:4200


Ferrari F430 "Miami Vice" - Work In Progress Part III

   I finally finished to work on the Ferrari F430 used in the movie "Miami Vice". Before reinstalling it, I added to the floor tailored mats in black velvet and saw that I had made to get carried away, I lined with velvet even the floor of the trunk. At that point, I was able to close the body to the chassis and now this diecast model makes a fine display alongside the other two Ferrari used in the TV series "Miami Vice". I have yet to decide what will be my next "victim" to change, but stay tuned and we will see some beautiful thing!

Posted by: Fabiano on Wed 3/23/2016 16:0600


Dodge Charger Daytona "Furious 6" by Greenlight

   I need to insert my latest purchases in the site: it will be a little bit hard because I'm late, but today I start presenting you the Dodge Charger Daytona driven by Toretto in the movie "Furious 6". This diecast model is produced by Greenlight for "Artisan Collection" series, which means excellent model from the aesthetic point of view, but with some limitations such as the lack of openings, the absence of the engine, details scarce on the bottom of the chassis and some wrong details like the gold external mirror. It must be said, however, that the model has excellent details regarding the rims, a well-proportioned body form, well detailed interiors and excellent coating, free of defects. I definitely recommend it to all the fans of the saga of "The Fast & The Furious", but only if you can buy it equal to or less than 75 Euros. If you have to spend more, choose some other more detailed model or a more noble brand.

Posted by: Fabiano on Mon 4/4/2016 20:1200


Street Hawk: another crazy idea!

   This week I was a little on the run ... the work kept me busy every day, so I managed to find a bit of free time this weekend to talk about my last strange idea! As I had done a few years ago, I came back the urge to create a model a bit more accurate of "Street Hawk", the motorkbike of the legendary TV series of the 80s, starring Rex Smith in the role of Jesse Mach. This time, I decided to do a "merge" between two existing models on the market: the usual Honda XR400R scale 1:18 produced by Maisto and a vintage toy of "Street Hawk" produced by LJN Toys in 1984. Before someone cries shame on the fact that I will modify a vintage toy (which today circulating in a few specimens) will I point out that I own two: a perfect MIB, still sealed in its original packaging and a "loose" with some signs due to the time . The idea will be to remove from the 80s toy the wheels and its forks, creating the space to accommodate the chassis of the Honda XR 400 R. As you can see from the pictures, the dimensions are pretty much perfect and a couple of more precise wheels and a new paint that will hide the flaws, this model will shine again, modernized and brought in the 2000s! You say I'm crazy? Let me know what you think and any suggestions! Have a nice weekend!

Posted by: Fabiano on Sat 4/9/2016 11:1600


Street Hawk: let the merger begin!

   Last night, after work, I found the inspiration to start working on "Street Hawk": Dremel armed I took my courage and started to "dismember" the toy version of Street Hawk and the Honda XR 400 R. I must admit that it was not difficult, partly because the plastic under the blows of the Dremel has easily give up: I safely removed the small golden wheels and their forks. Then I proceeded to remove all the unnecessary from the Honda XR 400 R, leaving only the chassis. I then started the "fusion" between the two bikes and as you can see in some images in the gallery, the combination of the two is perfect! I'm really pleased... I think this time will emerge a truly successful model! Stay tuned in the coming days because I will update with new pictures on the state of play! Enjoy with the pics!

Posted by: Fabiano on Tue 4/12/2016 12:2600


Street Hawk: merger completed!

   During the last weekend I continued to work on "Street Hawk": I finished at last to empty the inside of the shell to allow me to easily position the new chassis with larger wheels. I created then with plasticard also an indoor slide attached to the body that will serve to accommodate the headlight closed or open; moreover, always with plasticard, I created a support that will keep the bike upright, since I have eliminated the stand. I then proceeded to place the two parts of the body on the frame and as you can see from the pictures, the result is excellent. I have yet to apply stucco to close the old holes on the left side and make a few shots of sandpaper (as I did on the right side to remove markings indicating the brand and the production year), then I can move on to painting (before the primer and then the flat black paint). See you soon with some other update!

Posted by: Fabiano on Thu 4/21/2016 14:4800


Street Hawk: a new paint!

   The work on "Street Hawk" proceed: last night I disassembled the new chassis and the bodywork after having passed it with fine sandpaper and then I plastered the previous holes for the screws on the left side. At that point, I was ready to switch everything to painting process: I have given 3 coats of flat black paint and tomorrow should be completely dry, ready for a new assembly test. Then I'll have to find a silver marker to remake the side details and one gold marker for the 2 wheels. I hope that for now the result will satisfy you! See you soon with some other update!

Posted by: Fabiano on Fri 5/6/2016 16:2200


Vector W8 TwinTurbo by Ricko - "Rising Sun"

   Fortunately, the weekend just past delighted us with beautiful sunshine, so I took the opportunity to do some pics to the new models that will show you from time to time during the next few days. Today is the turn of the beautiful Vector W8 produced by Ricko. As I had pointed out when I bought it, I selected red to replicate the car used in the movie "Rising Sun". The model is made really well: in addition to the vertical opening doors, it also opens the engine compartment and the trunk, positioned under the rear spoiler. Also, something I particularly like my last purchases, is the fact of having even the retractable headlights, operated via a lever positioned under the chassis. The painting is really excellent, the details are very accurate and well-groomed: only comment perhaps on the engine, where they could give a less plasticky effect adding some details (wires, less chrome, etc.) To conclude, therefore, the model is really well realized and given that no other company has ever attempted to reproduce this car, I would say that the Ricko version remains the only choice: today, unfortunately, is a fairly rare model to find, but with some luck, if you like it as I adore it, you can find a very good example for a good price. Surely I will propose also a comparison with the Lamborghini Countach LP5000S of Kyosho, the model that best approaches for performance and lines decidedly angular and muscular. Now enjoy the pictures: have a good fun!

Posted by: Fabiano on Mon 5/23/2016 14:5700


Street Hawk: assembled!

   While waiting to receive at home the last purchases, I am continuing to work on "Street Hawk". Yesterday I finally fixed the two parts of the body to the frame and I must admit that the result satisfies me a lot! In the coming days I will define all the silver details both on the motorcycle body, both on the pilot suit. After that I will apply the stickers on the top of the tank and also I will complete the front headlight that, thanks to the slide that I created internally, can be placed both in the open and closed position. The road to complete it will not be short (because I can not devote too much time after work), but I hope to show it finished as soon as possible! Now I leave you to the pictures!

Posted by: Fabiano on Fri 5/27/2016 15:0100


Ferrari LaFerrari by Hot Wheels Elite

   New week, new purchase to show you: this is the wonderful Ferrari LaFerrari produced by Hot Wheels for the "Elite" series. Unfortunately, at the moment, I can not connect it to any movie since it has never been used for this purpose, but it is so beautiful that I could not put it in my collection. The model I have to say that is made very well: the painting is of excellent quality and level of detail inside and out is very high. I must admit that I can not find a flaw! Now enjoy the pictures of this fabulous LaFerrari and in the coming days I will also show you other supersport Ferrari I bought over the past weeks. Enjoy with the pictures!

Posted by: Fabiano on Mon 5/30/2016 17:4600


"Two Lane Black Top": 1970 Pontiac GTO "The Judge"

   I imagine that with the combination of the two cars of the film "Two Lane Blacktop" you've enjoyed a lot, so I told you in the last post, today I would stay on this film: I checked and I had already shown you the 1955 Chevy One-Fifty in October of the last year. So, today I will show you the beautiful diecast model of the 1970 Pontiac GTO "The Judge" produced by GMP. As you may recall, it is a fairly rare model that I had been reported on eBay by Giuseppe Masetto (who owns an identical model): after crossing the ocean finally came in my collection! As you can see from the pictures the level of detail is very high, like brands such AutoArt, Kyosho, etc. The painting is well done, perhaps only with a shade of yellow slightly more load than the actual car used in the movie. The details of the car are very well detailed, both in the engine compartment (fab the air filter in contact with to the hood), both in the trunk (with the jack, the spare wheel and the model number, because it's a limited edition), both inside the well shaped dashboard that includes all the instruments and the buttons on the central console. It's a really crazy piece that, although devoid of the official license of the film (on the box it appears the words "Double Lane" and not "Two Lane Blacktop") perfectly reproduces the real car, even in some details such as the plate. But now enjoy the pictures!

Posted by: Fabiano on Wed 6/8/2016 12:1600


"Friends": 1977 Checker Taxi

   New week, new presentation of a model already added some months ago in my collection: it's the 1977 yellow taxi used in the TV show "Friends" by the character Phoebe Buffay. This car does not play a very important role in the series (it was used only 2/3 times maximum) but since I'm a big fan of this '90s sitcom, I wanted to have a piece in the collection to remembered it. Last year, I bought this Taxi produced by Greenlight: I must admit that it is not perfectly reproduced. Apart from a few inconsistencies in the identification numbers (the Taxi on the show was almost always marked by the sign 7E85, while here shows the 2x85 code that appears instead only once in the series), the model also presents a detail level not very high: the coupling of the doors is not accurate and the front indicators and taillights were simply painted directly on the body (it would have been preferable to make them with translucent plastic). The engine is very simple, made with some plastic part colored in black and silver. Inside the car, in the back, there are two folding seats, which are helping to improve the detail of this typical New York Taxi. I recommend buying it? Mhmmm ... only if you are a real fan of "Friends", or folded more! But now, enjoy the pictures!

Posted by: Fabiano on Mon 6/13/2016 15:2400


"Bianco, Rosso e Verdone": Alfa Romeo Alfasud

   The model I present you today is in my collection from a long time, but I never managed to make him the appropriate photos. Today is the time to show it: it's an Alfa Romeo Alfasud 1.3 produced by the Laudoracing-Model. The model is made entirely of resin and does not present any type of opening, but other than that detail, is a model produced very well indeed. I added it to my collection to play the Alfasud used by Pasquale Ametrano (character played by Carlo Verdone) in the movie "Bianco, Rosso e Verdone", classic Italian comedy of the early years 80. For those who live outside of Italy, this film will say little, but for Italians is really a cult! In the film the poor Alfasud does not hold a real starring role, but in most scenes is the target of some petty theft that will infuriate its owner at the end of the film. The model is worth buying? For me it definitely is built very well (and for me the absence of the openings is not a problem) and beyond to track the car of a famous movie, you'll take home a classic of Italian cars!

Posted by: Fabiano on Fri 6/24/2016 14:3500


"Beverly Hills Cop": Chevy Nova by Greenlight

   Even today I continue to show you a new model, also bought a few months ago: this is the 1970 Chevy Nova used by Eddie Murphy in the movie "Beverly Hills Cop". The model is produced by Greenlight for the Artisan series and therefore does not present many openings, if not for the hood. The paint is very good, although I have to admit that the model is not very accurate compared to the real one: in the film, in fact, the car was completely ruined and battered, while the 1:18 scale model reproduces a perfect car, practically new. Also the color of the paint is too lively than the actual (compared with those in the photo above). The detail of the engine is more than good, while the interior is quite simple but sufficient. It is worth to be purchased? In my opinion no: if you were to find it at a reasonable price (less than 60 Euros) ok, otherwise forget it and point to better models. Now I leave you to the images.

Posted by: Fabiano on Wed 6/29/2016 17:0200


"Golden Eye" BMW Z3 by UT Models

   As usual I'm always late! There are still a few days to the much-awaited vacation, but I still wanted to update you on purchases in recent months. I'm also waiting for the new display cases built by Designtrasperente in such a way that they can also expose all the latest purchases, but I will have to wait until September ... so let's go with order! Today I show you the BMW Z3 used in the movie "Golden Eye" series of 007. The model is produced by UT Models and is presented in a commemorative box of the film, with lots of photographs and frames extracted from the film. The model is made really well: perfect proportions, excellent paint and good level of detail. It's possible to open the bonnet and the two doors, while the trunk is locked ... pity, one of the few flaws of this model! Another flaw is the engine: just detailed and very plasticky. For the rest, I really like it and will make a fine show with the other car of James Bond, including another BMW Z8 that I will show you in the next few days! For now, enjoy with the next pictures!

Posted by: Fabiano on Tue 8/9/2016 11:2300


"The World is Not Enough" BMW Z8 by Kyosho

   Just to catch up on the time lost in the past weeks, I am here today to show you the other BMW used by James Bond in the film "The World is Not Enough." It's the BMW Z8, in this case, produced by Kyosho. Speaking of this manufacturer is clear that the model has a fairly high level of detail, certainly it's most detailed than the Z3 produced by UT Models that I showed you yesterday. Even in this case, the proportions of the body are well respected, the coating is perfect and both the interior and exterior are well detailed. In support, even if the pictures I have not photographed, there is also the canopy to close the car roof. Until Friday I will continue to show you other models, then finally they come for me the holidays! Then enjoy the following pics and have a good afternoon!

Posted by: Fabiano on Wed 8/10/2016 14:2800


"Rush": Ferrari 312 T2 by Hot Wheels

   Finally I'm here to introduce the first of two F1 cars used in the movie "Rush": today I will show you the Ferrari 312 T2 brought to the track by Niki Lauda. This model is produced by Hot Wheels for the Elite series: the model looks really very well done, with many details especially on car interiors and at engine level. The painting is well crafted and decals are well reproduced; only fault the fact that it is not possible to remove the upper part of the bodywork in a manner to have access to the chassis and to the underlying engine. The model is solid but given the simplicity of a F1, the weight is significantly lower than that of a standard diecast model. I recommend to buy it? Definitely, it's really worth it! This model is the best one for the F1 Ferrari used in 1976: but if you would like to have something more detailed, you can point to the 1975 model (the 312T, the Ferrari World Champion with Niki Lauda) produced by Exoto. In this case the level of detail will be significantly higher (removable shell, very detailed engine, etc) but the price will be much, much higher!

Posted by: Fabiano on Thu 8/12/2016 11:2000


"Rush": McLaren M23 by Minichamps

   After showing the Ferrari 312 T2 used by Niki Lauda, ​​it's now the turn of McLaren M23 driven by James Hunt. The model I purchased is produced by Minichamps. Needless to say that is fabulous, the photos speak by themselves. Ok, the Ferrari produced by Hot Wheels is a very good model, but this McLaren is spectacular: the level of detail is very high, you can completely remove the upper part of the body, allowing access to the engine and the chassis. Also in this case the paint is very well done, the colors are very vivid and even the decals are very faithful to the original, particularly because on the sponsors there was a brand of cigarettes, which fortunately in the model it has not been obscured. I must admit that it is one of the models in my possession that I count among my favorites. And it's quite obvious that I would suggest you to buy it, if you should find one. The price at which they are located is well above average, but trust me, it really worth it to have it in the collection! Now enjoy the pictures!

Posted by: Fabiano on Thu 8/13/2016 12:1400


Ferrari F50 by Hot Wheels Elite

   It just ended mid-August and I hope you rested and enjoy it! But now, after taking a little sun and I did a little swim at the beach, you have to go back to talk about modeling. So today I want to show you the Ferrari F50 produced by Hot Wheels I purchased a few months ago. As surely remember, I am not a great lover of this Ferrari, but having in the collection the F40, the Enzo and the LaFerrari seemed obvious also buy this model. As you can see from the pictures it is the Elite version, more detailed than the basic version: the realization is not bad at all, although in my view seems a Burago version of a quality a little higher. I do not know if my opinion is little not objective because I do not particularly like the F50, but certain details like the wheels, the engine and the interior in my opinion could be more detailed. It is certain, however, that it is a good model, and together with the other Ferrari definitely makes its scene! But now, enjoy the pictures!

Posted by: Fabiano on Fri 8/16/2016 10:3000


"Velocità Massima" Lancia Delta HF by SunStar

   After a break dedicated to a Ferrari, we return to a model on the theme of cars used in movies and TV series. Today I will show the Lancia Delta HF Integrale used in the movie "Maximum Speed". The version that I propose you today is produced by SunStar and overall the model is not bad, but still has some flaws. The proportions and lines of the body are correct, the painting is well done (apart from the rest today it's hard to find the red version in my possession), but on the level of detail they could do a lot more. We start from the engine: bad ... devoid of any detail, is made with a single piece of molded plastic! Then we go to the interiors: in my case I had to re-paint the gray dashboard with a black paint. I have also taken measures to remake the decals relating to the dashboard instruments since even the original ones were made ill. The seats, then, had an absurd flaw: they moved back and forth as if we were in front of a car 2-door ... I then proceeded to block them immediately. Finally, the last defect concerned the height of the front wheels: originally the distance between the wheel and the wheel arch was much more pronounced, making almost seem the Delta a jeep! I proceeded to lower the height of the front sospesioni, applying a procedure similar to that which I used few years ago to lower the General Lee suspensions. To complete the changes, I then applied replicate plates used in the film: to complete it, I should also change the rims, but for now I could not find suitable ones. But the search continues! If you have any suggestions, do your thing!

Posted by: Fabiano on Fri 8/19/2016 14:4400


"Smokey and The Bandit" Pontiac Trans Am by Greenlight

   Today we go on a cult: those unfamiliar with the Bandit? I guess you all know who I'm talking about! In this case, I'm talking about the second movie in the saga of "Smokey and the Bandit" and then today I will show the legendary 1980 Pontiac Trans Am led by Burt Reynolds. To be more precise it is the model produced by Greenlight Toys and I must admit that it is made quite well. Only negative relative to this model are the T-Tops, which unfortunately are fixed and it's not possible to remove them from the body, as it does on the Pontiac Trans Am produced by ERTL (but htis model is about the first movie). I recommend to buy it? Absolutely, but I must admit to being very biased ... I really love this version of the Pontiac Trans Am, ever since I was a child and I saw it in the movie "Rocky II" (though in that case it was a 1979 model) and then in front of this model I can forgive it some flaws! But now I leave you to the photos, enjoy with them!

Posted by: Fabiano on Fri 8/23/2016 13:0500


"The Persuaders" Ferrari Dino 246 GT

   It is almost the end of my holiday, so today you must took the last programmed post in which I show you another new model. Unlike the others I showed you a few days ago, this will suffer a heavy change in the next weeks, especially in the paint layer. To be more precise, it's the 1969 Ferrari Dino 246 GT produced by Anson and I want to make a replica of the car used by Tony Curtis in the TV series "The Persuaders." Of course, to do that, I'll have to completely repaint it in orange and will take advantage to add some details on it: I could also take the model produced by Hot Wheels Elite, but because I must completely change it I preferred to focus on a cheaper model, adding the ability to add some transkit to improve the final result. Of course the changes will begin in September and will document step by step as I have always done in the past. So stay tuned ... we will see some good!

Posted by: Fabiano on Fri 8/26/2016 15:3300


"Romanzo Criminale" Lancia Fulvia Coupè HF

   The holidays are a distant memory, September has come almost to its half, then it's time to resume talking about modeling. Continuing what we started in August, I want to continue to show you some of my purchases in recent months: today it's the turn of Lancia Fulvia Coupè HF used by Dandi (Alessandro Roja) in the TV series "Romanzo Criminale". I have always loved this car, even more when I saw it was used on this Italian TV series. Okay, the car does not play a major role in history, but identifies perfectly the character of the protagonist who uses it and perfectly reflects the period of 70 years where the series is set. Loving this car, I could not take the opportunity to add it to my collection: I chose the model produced by AutoArt that, as you can see from the pictures, is incredibly detailed, both outside (car body, lights, etc.), both within (passenger compartment, engine, trunk, etc.). I honestly do not find flaws: in my personal scale rating, I'd give it a nice 10... together with the DeLorean (always produced by AutoArt) close to perfection! If you love this model so do not miss it: the prices start to rise and you risk losing a really cool model that surely will acquire prestige over the years. Now I leave to the pictures, have fun!

Posted by: Fabiano on Mon 9/12/2016 15:4900


Lancia Delta S4 road version by AutoArt

   Finally, the work week is over, but before the weekend I wanted to show you another new model of my collection. New is not really the correct term for this model since I bought it six months ago, but since I never shown it, consider it like new. Today I want to show you the Lancia Delta S4 road version produced by AutoArt in metallic red color. The model does not refer to a model used on the cinema or on TV, but I bought it because have always been a fan of this car ever since, as a child my parents gave me a model of this car in scale 1/24 produced by Burago. Of course, the level of that model was very low, but it was enough to make me appreciate the lines of that car ... then the sporting exploits in the World Rally Championship did the rest! When earlier this year was presented dall'AutoArt the scale road version in 1/18, I felt the need to add it to my collection, exposing it near all the other most beautiful and most famous Lancia models. The model close to perfection: the painting is spectacular with those metallic reflections, every item in the car is done with great attention to detail (engine, interior, trim, etc.) I do not know if there is any among you loving Delta S4 but do not miss this masterpiece ... in the picture is beautiful, but live it even more! It's just a treat for the eyes! But now enjoy the pictures! Have a nice weekend!

Posted by: Fabiano on Fri 9/16/2016 15:3100


Lancia Delta HF Integrale "Club Italia" by Kyosho

   Today is Halloween and the site changes its skin to celebrate this special occasion. Surely tomorrow, with a day late, I will introduce the usual photo shoot done with my diecast models and the pumpkins that every year I like to sculpt. However, today you'll have to settle for the presentation of a model that I bought a few months ago: this is not a car used in a movie or a TV series, but a true automotive icon, the Lancia Delta HF Integrale "Italian Club" version, produced by Kyosho. I must admit that when I decided to buy this model I was looking for in the classic red and white colors, but the prices were quite prohibitive (250 Euros and up). For this reason I folded the blue version at a much lower price (less than 100 Euros). The quality is the same, the color a little less attractive, but I do it to fit the same! Apart from the color question, the model is always characterized by high Kyosho quality, with countless details both of the bodywork, both at the level of openings (open all the 4 doors!), both at the internal level (very finished although red interiors not make me crazy!). Summing up, it's a really cool model that reproduces well the icon of the rally of 80s and 90s and it is definitely one of those models must-have in your collection. Now I leave you the pictures, have fun!

Posted by: Fabiano on Mon 10/31/2016 12:1500


Lancia Stratos by SunStar

   Last month has been quite challenging: like maybe I had already mentioned, with the new year I will change jobs, and during the last weeks I am closing some projects to the old job. So you have to excuse me if I did not wrote anything from Halloween !!! However, to recover my mistake, I'm here to introduce you to a model bought a few months ago: this is the black Lancia Stratos produced by SunStar. Since in the previous posts I put some rally queens produced by Lancia, missing only the legendary Stratos. As you can see, even in this case I decided to purchase the road model, as I prefer this kind of car with a livery more above that we are used to during the rally competitions. The model is not bad considering that it is produced by SunStar, in a mid-range level. Of course, there are far more refined models of the same car, but the price/quality ratio of this model has impressed me a lot and so in the end I chose it. The strengths are definitely openings (including the front headlights) and some details (like the interior, the engine and the wheels). Now I can therefore be satisfied: in my miniature garage are proudly displayed the Delta HF, the Delta S4, the Fulvia and the Stratos. In the coming days I will return to show you models about the world of cinema and TV series, but now enjoy the photos!

Posted by: Fabiano on Tue 12/6/2016 14:3300


"Wagon Queen Family Truckster" by Greenlight

   I think I found the right balance between the commitments of my new job and my various passions (too many!) So here I am again to show some new models arrived in recent months in my collection. Today I want to show you the Wagon Queen Family Truckster used in the movie "National Lampoon's Vacation" with Chevy Chase. The model is produced by Greenlight for the series Artisan: the body proportions are good, the painting details (such for example the wooden side panels) are really well made, as well as the front and the rear part with double lamps that well characterize this car. The problem of this model are the openings, totally absent on the doors, both on the hood and the tailgate. The only "mobile" element of this model is the fuel cap: indeed a little bit for the cost at which it is sold! In addition, compared to the prototypes shown before production, also they lack all of the objects positioned on the roof of the car, the elements that characterize this car even more. I recommend buying it? Mhmmm ... only if you are real fans of this film 80 years, or folded on other models finished better.

Posted by: Fabiano on Tue 4/4/2017 10:5800


McLaren M6 GT del 1969 by Tecnomodel

   Here I am! As promised today I show you the model I introduced yesterday, the 1969 McLaren M6 GT produced by Tecnomodel. Compared to other times, today it will be a real unboxing, because a really nice thing about this model is the box that contains it and it would be a shame not to show it. Needless to say that the model is really amazing, from every point of view. It is not a classic diecast model but it is a resin model, then unfortunately no opening, but for the rest the level of detail is very high. As I told you yesterday, I bought this model to cover a big lack in my collection, namely the Coyote X from "Hardcastle and McCormick". The McLaren was used as base vehicle to create unique car used in the first season of this series (remember, in fact, that from the second season they used the chassis of a DeLorean DMC with a fiberglass shell more "clumsy"). Compared to Coyote X, therefore, there is some difference, especially in the back (rear window and lights), but I shall undertake no changes to this model because it's so perfect and delicate, that I would never venture to fix it. The only change, perhaps, would be to obscure the front headlights with an adhesive film, but I have to think a bit before ... Now, before I leave you to the images gallery, I want to thank Nicola Fasano again for giving me the information about the existence of this model. Without his valuable information, probably today I would not have this beauty in my collection! Have a nice vision!

Posted by: Fabiano on Thu 4/6/2017 17:5510


Kawasaki CHiPs (Bike 1) - First step

   Due to my usual work and family commitments, I can not devote myself daily to the realization of the two CHiPs bikes, but the work is still going on. For now, I completely removed the body parts (tank, side panels and rear fender) from the Kawasaki 750 and cut off part of its chassis (in the rear) to allow the mudguard and the flanks from the Kawasaki 1000 Police. In addition, I have enlarged the tank holes so that it can be rested on the Kawasaki 750 frame, since it is much wider than the 1000's. As a last resort, I replaced the drains (the Kawasaki has 3 exhaust pipes , 1 on the left and 2 on the right) with the Kawasaki 1000 exhausts: naturally they will be painted with chrome paint, as I will also do for the parabordo and the paramotor. I then tried to take a picture with some mounted parts, just to see if I'm on the right track, and the result I like a lot! The road is still long, but I'm on the right track! Upcoming Update!

Posted by: Fabiano on Sun 5/21/2017 10:1300


Kawasaki CHiPs (Bike 1) - Second step

   Although I have been silent for a few weeks, I did not stop: I continued working on the first CHiPs Kawasaki and I must admit I was very happy with the progress made. I painted the lateral bags and replaced the plastic antenna with a new one created with iron wire (which I will then paint white with the red tip) and I have separated the lateral sides from the rear fender, so now I can position better the same lateral sides. After Nicola's suggestion, I also lowered the tank somewhat, especially at the front (you can see it in the last photos of this series): to do this, I have enlarged a tank inlet but I also tapered a few millimeters from the chassis. As a cherry on the cake, I added the frontal extra lights and even the windshield. Of course there is still a lot of work to do: I will try to keep you updated more steadily, but if you have any suggestions, come on!

Posted by: Fabiano on Thu 6/8/2017 21:1900


Chevrolet Corvette C1 (1959) by AutoArt - "Animal House"

   I have to admit that last year, when I was looking for this car, I did not think it was so hard to find it, but it was a very difficult task. Wanting to add to my collection the 1959 Chevrolet Corvette C1 used in the movie "Animal House" immediately, I had decided not to buy the one with the official license of the movie (produced by ERTL/Joyride) as it was the 1961 model, so wrong . After searching on eBay I found that the only correct model was produced by AutoArt, but the prices were high and many sellers confused the model with that of 1958: finally after 4 unsuccessful shopping attempts, I found a German seller who found the correct model at a fairly reasonable price so I managed to bring it home! Needless to say, the level of detail is very high and every detail is reproduced in the best of ways, from body shapes to painting. The model is fully open (hood, trunk and door) as well as of course the removable hardtop roof that, when removed, allows you to taste the lines of this splendid convertible car. Whenever I have an Autotar model in my hands I always think that this brand never fails a shot, always producing high quality models! But bidding at the cracks, now enjoy the photos!

Posted by: Fabiano on Mon 6/12/2017 23:1600


Lamborghini Miura P400 by AutoArt - "The Italian Job"

   While updates to the first CHiPs Kawasaki are about to end (detailed photos will follow in the coming days), today I want to introduce you to a new model that came into my collection a few months ago: this is the Lamborghini Miura P400 produced by AutoArt, bought by me as a tribute to the orange Miura that appears at the beginning of the original movie "The Italian Job" (1969). There are various Miura models on the market, but the one produced by AutoArt, as usual, is the best: high details, perfect shapes and proportions, excellent painting . This model does not have the slightest defect, as you can see from the images. If you like this car model and you should have the opportunity, do not let it run away, really deserves a place in any collection! Now I leave you to the pictures, have a nice weekend!

Posted by: Fabiano on Sat 7/1/2017 10:5100


Dumb & Dumber van: Work in Progress - Step 1

   Goodmorning everyone! This is a difficult period, because of the Covid-19 which is changing our way of life, day by day: in my case, luckily, I have been at home for 2 months, I continue to work in smart working, but in the meantime I took advantage of this situation to go back to modifying some models, updating also the site itself. The project I started a few weeks ago had been in the pipeline for a long time, but I had never found the time nor the desire to carry it out: it is the van used in the film "Dumb and Dumber". Today I can finally show you, starting from the first changes to the basic model (a 1983 GMC Vandura produced by Greenlight Toys) up to the finished model in the coming weeks. In addition to the rest, I have already queued many other new models, but we will talk about this later. Today enjoy the images of this van to which I had to remove the wheel arches with the Dremel and I had to start creating with the pasticard the new longer front that will house the dog's muzzle. Have fun and see you soon with other news related to this new model!

Posted by: Fabiano on Wed 5/6/2020 17:3210


Dumb & Dumber van: Work in Progress - Step 2

   I'm back here today for the second part of this new work in progress dedicated to the van used in the film "Dumb and Bumber". After showing you in the previous post how I removed the side wheel arches and the application of the new templates to make the front, today I will show you the application of the new front made with plasticard and then the coating of the muzzle and the doors. Of course, having opened the model, I took the opportunity to coat the dashboard and seats with fur. Ah, to simulate the fur I used an old sweater made of fleece branded Fila. Now enjoy the pictures and have a nice weekend!

Posted by: Fabiano on Fri 5/8/2020 17:1210


Dumb & Dumber van: Work in Progress - Step 3

   The changes to the van used in "Dumb and Dumber" proceed quite quickly: I have finally completed the covering of the entire bodywork (sides and rear). From the following photos you can see how the model now looks, both externally and internally. Within the end of this week I will update you with new photos related to the roof and the external details (legs, ears, etc.). Now enjoy the pictures. Have a nice day!

Posted by: Fabiano on Tue 5/12/2020 10:4410


Dumb & Dumber van: Work in Progress - Step 4

   As promised here I am with a new episode dedicated to the van used in "Dumb and Dumber". Today I will show you updates that naturally include the roof lining and the construction of the legs and ears. These parts were built with plasticard, making flat shapes and then applying vertical edges to give a thickness. Then I filled the various parts with the contents of an old cushion and covered everything with fleece fur. In this way, both the legs and the ears kept the right shape but remained very soft to the touch. To conclude, on the roof I have prepared a coupling system to easily attach and detach the tail (which, however, I will show you next week). Now enjoy the pictures and spend a nice weekend!

Posted by: Fabiano on Fri 5/15/2020 12:2810


Dumb & Dumber van: Work in Progress - Step 5

   We are almost at the end of the work in progress of the "Dumb & Dumber" van: today I will show you the creation of the tail (sewn by my wife, if I have to be honest), the nose and some other details related to the side legs. By the end of next week, I will post the final images of the van completed with other details (the tongue, the side signs, the licence plate, etc.) Stay tuned then and enjoy the new image gallery!

Posted by: Fabiano on Thu 5/21/2020 10:4810


Dumb & Dumber van: Work in Progress - Step 6

   And here we are finally with the last episode dedicated to the creation of the van used in the movie "Dumb and Dumber". In this series of new images I will show you how I completed the model by adding the legs on the rear doors, the tongue (created as the nose with the DAS and then painted with the spray can), the front lights and the wheels (from an old damaged Dodge Challenger) and decorative elements, including the license plate, the side signs and the freckles on the front of the van.
   Finally, after a long time that I wanted to make it, I managed to complete this very particular model that will now embellish my diecast car collection. Now enjoy the new pictures with the latest changes and don't worry, from next week I will show you other models that I am modifing during this period of lockdown. Have fun and spend a good weekend!

Posted by: Fabiano on Fri 5/29/2020 12:2210


"Christmas Cars" - Work in Progress - Step 1

   Once the quarantine due to the lockdown ended, I had to recover some (of the freedom and) of the lost time, but I still dedicated myself to customizing my diecast models. I have not updated the site, so I take this opportunity now to offer you some models in the coming weeks that I have modified in recent months.
   Today I would like to start again by offering you the 1969 Dodge Charger, in the "General Lee" version used in the last movie directed, produced and starring John Schneider, "Christmas Cars". I don't know how many of you have seen it, but in my case I managed to buy an autographed copy of the DVD directly from John Schneider and I enjoyed it during the last Christmas holidays. Watching the movie I had the idea of ​​making a model of this car: many will not love the choice to cut the roof of a General Lee (but by watching the film and following all the recent facts related to the problems of the Confederate flag you will understand more of its meaning, still appreciating more about the movie and the message that John Schneider wanted to convey).
   Going back to the model, the car used in the film is actually a Ford Crown Victoria covered with the bodywork of a 1969 Dodge Charger: I wanted to recreate something that therefore came closest to this fusion of two cars, so I didn't use a real General Lee model (ERTL, AutoWorld, etc.), but a simple 1969 Dodge Charger produced by Maisto and a Ford Crown Victoria from Motormax. In the next episodes of this work in progress I will show you how I managed to combine these two cars, creating a "hybrid" General Lee without its roof. But now I start showing you the model and the first changes that I made on it, removing the rear black stripe). Enjoy and have a nice weekend!

Posted by: Fabiano on Sun 8/2/2020 15:5400


"Christmas Cars" - Episode 2

   With Ferragosto almost upon us, here I am to show you the progress made on the General Lee used in the movie "Christmas Cars". In this series of images that I will publish today, I will show you how I disassembled the Charger produced by Maisto, the Ford Crown Victoria model that I will dismember to use some parts, the much-suffered roof cut and the installation of parts taken from the police car to put them in the Dodge Charger. The next step will be to replace the alloy wheels mounted on this model: initially I will mount temporary rims taken from an old General Lee produced by ERTL, but later I will replace them with custom rims projected to the CAD and 3D printed with resin. Please, keep following this project and have a good holiday!

Posted by: Fabiano on Fri 8/14/2020 16:0700


"Christmas Cars" - Episode 3

   After taking a break for a short 4 days vacation, here I am showing you some progress on General Lee from the movie "Christmas Cars". In the images that I will show you you will be able to see, with a better light, the parts of the Ford Crown Victoria mounted on the Dodge Charger, but also a set of temporary rims (taken from an ERTL General Lee), waiting for my colleague Andrea to print the new rims with resin, but also the front bullbar. In the next episode I will also show you the CAD drawing of the wheels and the related modifications made to mount them on the Maisto Dodge Charger. That's all for today, enjoy!

Posted by: Fabiano on Thu 8/20/2020 09:0700


"Christmas Cars" - Episode 4

   After a few days here I am with some new updates on the Dodge Charger/Ford Crown Victoria used in the movie "Christmas Cars". As I had anticipated in the last post dedicated to this model, I had mounted temporary rims borrowed from a General Lee produced by ERTL. In the meantime, however, thanks to the help of dear friend Andrea Ciardulli who assisted me in the 3D modeling, I proceeded to create new replacement rims that came as close as possible to the American Racing Vector rims mounted on the real General Lee.
   Below you can see the various resin printing tests that I did up to the version that I believe to be the definitive one: the final model has not yet been painted, but this operation will be carried out when I return from the many desired holidays! In addition, in the gallery of new images you can also see the new decals that I have prepared and applied to the cut roof. Be patient then for another 2 weeks, after which I will update you with the final photos of the painted and mounted rims on the car.
   But tomorrow, before leaving for the holidays, I will publish one more post dedicated to the first modifications made on the Dodge Challenger of the movie "Stand On It". I'm in a creative mood and I have to take advantage of it!

Posted by: Fabiano on Thu 8/27/2020 23:2810


"Stand On It" - Episode 1

   As I promised, here I am with the last post before the holidays: before showing you the Challenger used in "Stand On It" I show you the update on the Charger used in "Christmas Cars": today my buddy Andrea gave me the 4 wheels printed in resin, still need to paint them, but I have already tried to fit them on the car and I would say they look really good! Judge for yourself! In just over 2 weeks, on my return, I will finish the work on this car, be patient!
   The work on the Challenger is progressing very fast, so I didn't want to wait too long to show you the pictures of this car, so I take this opportunity to show you the changes made to the bodywork to create the T-Top, the air intakes on the hood and the painting of the gold-colored rims. At the end of the holidays I will show you all the further updates and I am sure you will fall in love with this car too and you will be looking forward to watc John Schneider's new movie "Stand On It". Now enjoy the pictures and see you soon!

Posted by: Fabiano on Fri 8/28/2020 15:4330


"Stand On It" - Episode 2

   Here I am back from vacation! During the holidays I planned (and ordered) several new models to modify during the fall and winter, but there will be time for that...
   Today I want to show you the progress made on the Dodge Challenger used in the movie "Stand On It" by John Schneider. As you can see from the pictures, I have finally removed the paint from the body, and I have also started to do some tests for printing the eagle that will then go on the hood. To conclude, I then proceeded to fill the hood air intakes, perfectly detailing the new hood lines.
   In the next episode I will finally show you the painted bodywork. Now enjoy the pictures!

Posted by: Fabiano on Tue 9/15/2020 21:5980


"Stand On It" - Episode 3

   Happy weekend buddies, today I want to show you the progress made on the Dodge Challenger used in the movie "Stand On It" by John Schneider. As you can see from the images, I finally painted the bodywork with an awesome glossy black: I am very satisfied with the result obtained above all on the bonnet, but also for the black / gold combination that the car must have at the end of the work.
   We are definitely on the right track, there is still a lot of work to do but I am more and more satisfied! See you on the next episode!

Posted by: Fabiano on Sat 9/19/2020 15:4050


"Christmas Cars" - Episode 5

   Summer is now over and autumn, with its low temperatures, has already shown up here in Varese. So what's better than getting to work to complete some diecast models? Over the past weekend I took the opportunity to work a bit on the General Lee used in John Schneider's "Christmas Cars" movie. Finally I managed to paint the rims, then finishing them with chrome details using the "Liquid Chrome" pens produced by Pump Marker (purchased on Amazon). The final effect is amazing, just look at the comparison I made with the rims of an old General Lee produced by ERTL. In the next few days I will also make a comparison with those mounted on the General Lee of AutoWorld. But now enjoy all the photos and let me know if you like them! See you soon!

Posted by: Fabiano on Mon 9/28/2020 15:1860


"Stand On It" - Episode 4

   Today we continue with the other project that I am carrying out in this period, the Dodge Challenger used by John Schneider in the movie "Stand On It". Finally, after having completely painted the body in glossy black, I proceeded to apply the grids on the air intakes of the hood (I used a kitchen sieve), after which I applied the gold stripes along the entire body.
   The result is amazing: even if the model has yet to be completed (mirrors, side windows and some other details) I could not resist putting it side-by-side to the two Pontiac Trans Ams from "Smokey and The Bandit", the film that inspired the new "Stand On It".
   See you soon with the latest updates on this model, after which I will start modifying a new model!

Posted by: Fabiano on Tue 9/29/2020 14:0490


"Stand On It" - Episode 5

   Finally we have arrived at the last episode of the series dedicated to the Dodge Challenger used by John Schneider in the movie "Stand On It". Not much was missing to complete it, but I still had to install the exterior mirrors and build the rear side windows. So now I can consider this custom model really completed, but as you can see from the image above, something is brewing: you will remember that at the beginning of the creation of this model I used 2 Challengers to use the front wheels of one to put them in place of the rears of the other. So I had this second Challenger and this time I have decided that I will do something that I have never done before, but you will have to wait ... it will be a surprise ... in motion!

Posted by: Fabiano on Sat 10/3/2020 18:2190


Xtreme Lee - Work in progress - Episode 1

   We are now in the middle of autumn, it's cold and the Covid-19 nightmare still hovers over our heads: there is nothing better, then, than staying at home in the warmth, perhaps working on some new model. It has been a long time since I wanted to replicate it in 1:18 scale and I finally found the incentive to start the legendary "Xtreme Lee", a modernized clone of General Lee made by musician Kenny Wayne Shepherd. To create this new model, I started from a base that is now fairly cheap and easy to find, the 1969 Dodge Charger made by Maisto. So I started by removing the R/T pad printed on the rear of the model and then I moved on to make the roof and door stickers using some photos of the real car found on the Internet.
   Now enjoy the photos, in the next few days I will show you the work done on the suspensions and rims. Have a nice Sunday!

Posted by: Fabiano on Sun 10/18/2020 13:5460


Xtreme Lee - Work in progress - Episode 2

   Slowly I am carrying out the work on the Xtreme Lee: today I have been busy recreating the rear axle where to connect the new rear wheels produced by ACME (model A1801837W). Since the attachment of the wheels was different from the standard ones produced by Maisto, I had to recreate a new axle with wire that would adapt to the suspension system provided on the model. I also adjusted the set-up and the new wheels are now at the right height.
   In the next few days I will go on mounting the new ACME wheels at the front. Enjoy it and see you next update!

Posted by: Fabiano on Tue 10/20/2020 21:2250


Xtreme Lee - Work in progress - Episode 3

   The Xtreme Lee couldn't stay without the front wheels for too long, so I went to work and modified the front axle to accommodate the new ACME wheels. To do this, I had to put some spacers, that is washers that allowed the wheels to be positioned flush with the body, just as I had already done for the rear wheels. Could I limit myself to this? Absolutely not, so I created (like the good old days!) the front push-bar with plasticard. Of course I also took the opportunity to report all the measurements on Fusion 3D so I can re-print others in the future (you never know!).
   That's all for today, but stay tuned: as soon as the brown paint I ordered arrives, I will proceed with the interior modification, you will see some nice ones!

Posted by: Fabiano on Thu 10/22/2020 21:3680


Xtreme Lee - Work in progress - Episode 4

   Last weekend I was able to work on the interior of Kenny Wayne Shepherd's "Xtreme Lee". First of all, I removed the old seats and built a support with plasticard to support the new, more sporty and enveloping seats (coming from an old Ferrari produced by Burago). Furthermore, since the new seats had a hollow back, I always proceeded with the plasticard to create the closure of the back. Of course, I then proceeded to paint all the pieces with a light brown paint (code RAL 1001, produced by Macota) and the result is truly fabulous! However, to complete the dashboard I proceeded to create a template of the instrument area and through my computer I created a decal to be applied on the plastic part. Finally, since I do this on all my models, I have lined the car floor with a darker brown carpet.
   We are therefore now towards the conclusion of this model: next time I will show you all the finished interior and the final assembly of the car. Bring a little more patience, it will be worth it, I promise!

Posted by: Fabiano on Tue 10/27/2020 19:1070


Xtreme Lee - Work in progress - Episode 5

   And here we are, as promised, to introduce you to the latest changes to Kenny Wayne Shepherd's "Xtreme Lee". In this case, the changes focused mainly on the interior, with the preparation of the decal for the center console. Not happy, however, I also decided to replace the engine with a more beautiful and detailed one produced by ACME. Needless to say, the result is fantastic: I am really satisfied with how it turned out and on the Instagram profile it is enjoying a lot of success among fans (including the same Kenny Wayne Shepherd who put "like" to the photo!).
   Now, I just take a weekend break, and then we start again with some new models, so come back and see me soon, since there will be news for Halloween anyway!

Posted by: Fabiano on Fri 10/30/2020 19:0840


"Bad Boys for Life" - Episode 1

   Never sit idle! The models to be modified are so many and since here in Italy we are again in lockdown due to Covid-19, I took the opportunity to start some new custom model. This time it was the Porsche 911 Carrera 4S used in the movie "Bad Boys for Life" (sooner or later I will tell you about my personal opinion on this movie ...). To create the replica of this car I bought 2 Porsche 911 Carrera 4S, one of the correct color (metallic blue) and one of the wrong color (gray) but with the right rims and interior as the one saw in the movie. All I needed was to swap the parts and this change was really quick and easy! I still have to make the plate, but in the next few days I will create and print it. Naturally I proceeded to sell the gray Porsche 911 Carrera 4S with the blue rims: the proceeds will certainly be used to finance some other projects! Enjoy and see you next time!

Posted by: Fabiano on Sun 11/8/2020 19:5450


Enos Race Car - Episode 1

   Good morning guys, between ups and downs (due to this damned situation of Covid) I try to distract myself a bit by modifying some diecast models. For some time I had been planning to complete the quartet of racing cars used in episode 7 of the first season of "The Dukes of Hazzard": more precisely, I was missing only Enos's car, already having several General Lee, the Lucifer (custom model created by me same years ago) and Cooter's Camaro, produced by AutoWorld. So I decided to buy a 1975 Plymouth Fury (in the police version of "Smokey and The Bandit") and modify it, preparing new graphics to be applied on the sides and on the trunk.
   Today I will show you the preparation of these graphics and the tests on the car, then in the next episodes the final application on the bodywork. Have fun and, please, stay safe!

Posted by: Fabiano on Wed 11/25/2020 14:3950


Enos Race Car - Episode 2

   Goodmorning everyone! We have left 2020 behind us and 2021 has already started two months ago but it is certainly no better than what we left behind. In these two months I have been quite busy with work, but the good thing is that in the meantime I have still moved on to modify a few custom models that I will show you in the coming weeks. So I would say to start again where we left off, that is from the progress on Enos' racing car: today I will show you the definitive laying of the side decals and the preparation of the one that will be placed on the trunk. In the next few days, however, you will finally see it completed, see you soon!

Posted by: Fabiano on Sat 2/27/2021 13:0650


Enos Race Car - Episode 3

   And here we are finally at the third episode dedicated to Enos' racing car. In the following pictures you can see all the decals applied on each side of the diecast model. Only the license plates that I will create in the next few days are missing, after which I will publish the last episode of this model and I will show you the first works on my next custom model.
   So do not miss the next episode and everything that will come in the coming months, you will not be disappointed!

Posted by: Fabiano on Sun 3/14/2021 12:0540


"Stand On It" - Sheriff car - Episode 1

   After the summer, my creative vein is back! With the upcoming release of "Poker Run", the new movie by John Schneider sequel of "Stand On It", I have decided to continue creating the other cars used in this film series. So today it's the turn of the car used and destroyed by the Sheriff Cletus T. Necessary (Tyrus) and by his son Sonny T. Necessary (Dion Baia). I have been thinking of making this car for some time, but I never decided whether to do the intact version or the one destroyed following the various accidents suffered during the film. Confronting myself with Dion Baia, who kindly provided me with some information about it, I decided to do the destroyed version.
   As you can see from the pics, the model has a dashboard reproduced in resin by my friend Roberto because its original dashboard was used in the Dodge Charger from the movie "Christmas Cars" (since in that case the car is not a real Charger but a replica based on Ford Crow Victoria). Once finished and painted, however, you will not notice anything!
   So today I show you the starting model, but in the coming days you will already see the result obtained with the Dremmel. It will be very funny!!!!

Posted by: Fabiano on Wed 9/15/2021 16:3760


"Stand On It" - Sheriff car - Episode 2

   New changes on the Ford Crown Victoria from the movie "Stand On It". This time I removed all the external details (lights, mirrors, handles, etc.), all the internal door panels and I removed the pad printing on the sides of the body. In fact, I could have done it only on the doors (since they will be the only parts to remain white and I didn't want to repaint them) but while I was there I preferred to do it also on the fenders to do a more complete and precise job.
   The next step will be to cut the roof, so always stay around and by the middle of next week you will surely see the final "shapes" of this car!

Posted by: Fabiano on Sat 9/18/2021 11:5970


"Stand On It" - Sheriff car - Episode 3

   As promised, here's the fun part: cutting the roof! When I am about to make these changes I am always a bit tense because if you are wrong you can not go back, but I must say that now I'm getting carried away and in fact I was not wrong! After disassembling the entire model, I proceeded to cut the roof pillars with the Dremmel in exactly the same points as we saw in the movie "Stand On It". I then tried to do some setup tests by also removing the driver's door and I would say that the car begins to look more and more like the one used by Sheriff Cletus T. Necessary and his son Sonny.
   The next step will be to paint the car in a shade of blue/azure identical to that used in the film. Come back to visit the site because in a few days you will see the new look of this Ford Crown Victoria!

Posted by: Fabiano on Wed 9/22/2021 11:3890


"Stand On It" - Sheriff car - Episode 4

   Day by day, the Ford Crown Victoria is increasingly resembling the real model used in the movie "Stand On It" and its sequel "Poker Run" due out later this year. As you can see from the images, I proceeded to create the dent on the front left fender and of course the whole body was painted with a blue/light blue shade. The next changes will affect the bumpers, rims, dashboard and decals on the front.
   Now enjoy the photos and don't miss the next episodes of this series!

Posted by: Fabiano on Mon 9/27/2021 12:0470


"Stand On It" - Sheriff car - Episode 5

   A few days late, but here I am introducing you to some other updates made on the Sheriff's car from the movie "Stand On It". As you can see from the pictures, I modified the front bumper by making a cut just like on the real car. At that point I painted it with the same light blue color and I applied it to the body. Finally, I created the decals with the Sheriff's logo (using a photo of Dion Baia) to be applied on the front doors and I reassembled all the doors on the body, of course all except that of the driver which, as in the film, is torn off by a truck driver and placed in the rear seats as evidence of the crime.
   Next week I will publish the pictures of the car with all the details reassembled: a few more days and then you can finally see this model completed. See you soon and have a good weekend!

Posted by: Fabiano on Fri 10/8/2021 12:1890


"Stand On It" - Sheriff car - Episode 6

   We are almost running out of this custom model: in fact today it's time to show you the car with all the details repositioned on the body, but also the painted resin dashboard that my friend Roberto gave me some months ago (in the Links section you will also find the link to his modeling site). The next step will be to find more suitable rims similar to the iron ones used in the film. So do not miss the next episode: you can enjoy the Ford Crown Victoria finally completed! Have a nice week!

Posted by: Fabiano on Wed 10/13/2021 13:46100


"Stand On It" - Sheriff car - Episode 7

   We have finally arrived at the end of this last model that I customized! In fact, I managed to complete Sheriff Cletus T. Necessary's car from the movie "Stand On It": I removed the original Ford Crown Victoria wheels and replaced them with a correct set of wheels (from a 1969 Dodge Charger produced from Maisto) by painting them in matt black. The final effect is now perfect and below you can then see the finished model in all its glory.
   In the next few days I will show it to you together with the Dodge Challenger Hellcat used by John Schneider (Duke Marietta). Enjoy and have a good start to the week!

Posted by: Fabiano on Mon 10/18/2021 11:29100


Happy Birthday General Lee - Part 1

   Waiting to complete the arrangement of the last showcases in my new attic (I will publish some new pics during the next weekend) I am carrying out the modification of 4 diecast models in parallel and today I would like to start showing you the first one. It was a project that I had in mind for a long time but that I never decided to make it: after seeing a similar version from my friend Roberto, I therefore decided to do it, but making a version more similar to the one made several years ago by Jeremey Tigner. Naturally I'm talking about the Dodge Charger that can be glimpsed in the episode "Happy Birthday General Lee": as a base I'm using a black Dodge Charger produced by Maisto and in addition to making some changes in terms of paintwork, I'll apply new resin-molded rims, a new engine much more precise than the standard one and of course I will also modify the interior, changing color and adding many more details.
   In this first episode, I'll show you the starting model and the new engine, then I'll show you the first changes in the next ones. See you soon and have fun!

Posted by: Fabiano on Thu 3/16/2023 14:5350


Happy Birthday General Lee - Part 2

   Here we are at the second episode of General Lee in the "Happy Birthday" version. In this phase I proceeded to modify the platform to accommodate the new engine, I painted the interior with the classic light brown and completely masked the bodywork of the car, leaving only the front mudguard on the driver's side exposed, then painting it with a gray primer to give the same effect as seen in the TV series. I also proceeded to paint the bonnet in the same way: to do so, I followed the same logic as Jeremey Tigner. In fact, in the series, the front fender and hood are completely distorted in the impact, so when the Dodge Charger is repaired, these parts are replaced and painted with a primer, before being painted orange. In the gallery, therefore, you will also find the repainted bonnet that I modified to be easily assembled and disassembled once the model is closed. But you will see all this in the next episode!

Posted by: Fabiano on Mon 3/20/2023 10:0560


Happy Birthday General Lee - Part 3

   Although in the new house there is always some little work to do to finish some rooms, I managed to find some time to go on with the "Happy Birthday" version of the General Lee. First of all I painted all the elements relating to the interior (seats, floor, side panels, dashboard, etc.) and after having assembled them, I proceeded to assemble the bodywork on the chassis: from the photos it is possible to see first of all the new engine it lends itself well on an aesthetic level in this diecast model, but also the final rendering of the model with and without the hood. In the next few days I will print the American Racing Vector rims (as I already did for the Dodge Charger from "Christmas Cars") so stay tuned because once this model is finished I will immediately start working on another version of the General Lee. Happy Sunday!

Posted by: Fabiano on Sun 3/26/2023 15:3570


Happy Birthday General Lee - Part 4

   A few days late, I managed to print the American Racing Vector rims with the attachment compatible with that of the Dodge Charger produced by Maisto. I printed 8 (and not just 4) because I will also need them for another model that I will make in the next few weeks, but it's too early to talk about it yet. In the next few days I will paint them and color the spokes and then finally I will be able to apply them on the model to complete this latest creation of mine. See you soon and enjoy the pictures!

Posted by: Fabiano on Tue 4/4/2023 12:0740


Green General Lee - Part 1

   While work on the "Happy Birthday General Lee" model is proceeding (I'll update you in the next few days with some photos), I started working on a model that I had been working on for some time but which I was postponing to find a good model from which start. I didn't want to modify a real General Lee (there are fewer and fewer of them now and given the cost it is not advisable to modify them) so I was looking for a good base from which to start but at an affordable price. So I found this 1969 Dodge Charger with a problem with the hood (principle of metal fatigue) but otherwise in really good shape. In the following photos you can admire it before its color is changed: anyway the idea is to paint it in the internal parts of orange and on the outside with a nice dark green, just like in the TV series.
   So stay tuned because in a few days I will show you the first changes on this model!

Posted by: Fabiano on Mon 4/17/2023 11:3070


Happy Birthday General Lee - Part 5

   Ready to start the engine? Finally I was able to complete the rims of this model: after printing them, I painted them matte black and then I detailed the spokes with a silver marker. Once positioned on the car, I proceeded to put the front grille and the rear light unit back in their place and this model too can be considered completed and ready to be displayed in the windows together with all the others.
   Now enjoy the photos and see you soon with updates on other models in the pipeline!

Posted by: Fabiano on Mon 5/1/2023 12:19104


"Stand On It" Tribute - Part 1

   Good morning buddies! A somewhat busy period (home, family, travel, etc.) but I'm still developing a few new models whose progress I'll show you in the coming weeks. Today I wanted to show you a model that is not really a "replica" of a movie or a TV series, but rather a "tribute". In fact, I decided to start from a Dodge Challenger SRT Hellcat produced by Solido and to modify it to make a "tribute" version of the film "Stand On It", adapting it to the livery chosen by John Schneider with the eagle and gold finishes but keeping somewhat the original look of this model with the classic muscle car rear stripes. So below you will find the photos of the original model, from which I have already removed the python pad printing from the roof (a really trashy thing...): in the next few days I will update you with the first stripes applied. Enjoy your vision!

Posted by: Fabiano on Mon 5/15/2023 11:5292


"Hollywood 1:18 Wheels" is not part of Hollywood Sign Trust and is not linked to the association or to any members of this community. A mission of this site is to provide information to help diecast collectors to found any type of car used in movie or serial TV. All images copyright � by Fabiano Spinelli. All rights reserved. You may not upload these images to a web site or distribute it commercially or otherwise. It is illegal to use these images on your web site and to post on community web sites. Copyright � 2007. July 16, 2007.
     Language


     Control Panel


[Signup] [LostPass]

     Random Pic

/036/001.jpg

     Social

Click here to follow us on Instagram!Click here to follow us on Facebook!Click here to follow us on Youtube!


     Calendar
<< October 2024 >>
mon tue wed thu fri sat mon
123456
78910111213
14151617181920
21222324252627
28293031

     MixPod

Click to listen the music


     The Cosby Show

     Map
Locations of visitors to this page

     News

In this period, I'm working on the Happy Birthday version of the General Lee used in 7th season the TV series "The Dukes of Hazzard"


     Google Ads

     Collectors

/043/

     Random Diorama

/016/001.jpg

     Google Ads